Author: zume

  • How to log in to cPanel control panel

    cPanel is our web-based control panel that allows you to manage your web hosting account and access various tools and features. In this guide, we will walk you through the steps to log in to cPanel to manage your web hosting account.


    After signing up for one of our hosting packages, you will receive a Welcome Email with all of the information you need to access your control panel. If you follow the cPanel login link provided, it will take you to the login screen where you can enter your credentials and continue to cPanel.

    Stay Secure

    You must update your password after receiving your Welcome Email. Learn how to update your cPanel password.

    Single Sign-on via the Client Area

    Log into the Zume Client Area using your credentials.

    Client Area Login

    Forgotten your Client Area password? Learn how to reset your Client Area password.

    Find your service

    In the Services dropdown, click My Services.

    Locate your service on the My Services page. Click the 3 dots, then View Details.

    My Services

    Log in to cPanel

    Click the Login to cPanel button to be taken to cPanel.

    Login to cPanel

    Forgotten your cPanel password? Learn how to reset your cPanel password.

  • How to connect to cPanel via SSH

    Connecting to cPanel via SSH allows you to manage your web hosting account more efficiently and run commands securely. In this guide, we will walk you through the steps to connect to cPanel via SSH using a terminal emulator or your own SSH client.


    Connect via cPanel Terminal

    cPanel provides a built-in terminal emulator that allows you to access your server via SSH directly from the cPanel interface. Here’s how you can connect to cPanel via SSH using the terminal:

    Caution!

    Be cautious when using the terminal, as running incorrect commands can cause corruption or data loss. If you are unsure about a command, consult with Zume or a system administrator. We cannot be held responsible for any damages caused by running incorrect commands.

    1. Log in to your cPanel account.
    2. In the cPanel dashboard, navigate to the “Advanced” section and click on “Terminal.”Terminal in cPanel
    3. Click the button to confirm that you understand the risks associated with using the terminal.Terminal Warning
    4. You will be shown a command prompt where you can run various commands on your server.Terminal Command Prompt

    Connect via SSH Client

    If you prefer to use your own SSH client to connect to cPanel, follow these steps:

    1. Open your preferred SSH client (e.g., PuTTY, Terminal on macOS, or Windows PowerShell).
    2. Enter the following command to connect to your server via SSH:ssh username@server_hostname Replace username with your cPanel username and server_hostname with your server’s hostname.
    3. When prompted, enter your cPanel password to establish the SSH connection.
  • How to change the primary domain on your hosting account

    Some plans include unlimited domains, so it’s not always necessary to change the primary domain on your hosting account. However, if you need to change the primary domain on your hosting account, follow these steps.


    Do you need to change your primary domain?

    Before you change your primary domain, consider whether you need to change it. If you have a hosting plan that allows you to host multiple domains, you can add additional domains to your account without changing the primary domain.

    I would like to change my primary domain

    Prior to requesting a change of the primary domain, ensure that the domain you would like to set as the primary domain is not already added to your hosting account.

    If the domain is already added to your hosting account, you must remove it first. Removing a domain will not delete any files, emails, or databases associated with the domain.

    Next, please get in touch with our support team to request a change of the primary domain on your hosting account.

    Contact our support team

    Please remember to include the new domain in your request!

  • How to add another website to my hosting plan

    If you have a hosting plan that allows you to host multiple websites, you can easily add another website to your account. This guide will walk you through the steps to add another website to your hosting plan with Zume.


    Point your domain to Zume

    Ensure your domain is pointed to Zume. There’s two methods to achieve this. We recommend using option 1, however if your domain is registered with Cloudflare and you are unable to modify your domain’s nameservers you should use option 2.

    Go to your domain registrar, and update the nameservers for your domain.

    These should be set to:

    ns1.zumedns.com
    ns2.zumedns.com

    You can read more information about our nameservers here: What are Zume’s nameservers

    Option 2: Create an “A” record

    1. Log into cPanel.
    2. On the right-hand panel, locate the section that says “Shared IP Address” or “Dedicated IP Address”.
    Shared IP Address in cPanel
    1. Copy the IP address and create an A record with your external DNS hosting provider. For example if you use Cloudflare, steps can be found here: How to add a DNS record in Cloudflare
    2. Finally, verify your nameservers to A record is correct using a DNS checker tool such as MXToolbox.

    Add domain in cPanel

    1. Log into cPanel. Read our guide on How to log in to cPanel if you need help.
    2. Navigate to the Domains menu in cPanel.
    Domains menu in cPanel
    1. Click “Create a New Domain”
    Create a New Domain in cPanel
    1. Enter your new domain. Make sure you uncheck the “Share document root” checkbox, otherwise the domain will be added as an “alias” of your main domain.
    Enter your new domain in cPanel
    1. Click “Submit”.
    2. A directory for the new domain should appear in your account’s home directory. You can use the cPanel File Manager or your own SFTP Client to upload files for your new website.
    3. An SSL certificate will be automatically provisioned for your new domain, although it may take some time.
  • Does Zume have any discount or promo code coupons?

    We know you like to get a good deal – who doesn’t? But in an industry rife with misleading pricing and hidden fees, we believe in being upfront and transparent about our pricing.


    Does Zume offer one-time discounts for new customers or longer terms?

    No. We will always display the true monthly price on our website.

    Also known as balloon rates, it’s a common tactic for hosting companies to offer a discount for the first term of service, only to increase the price significantly in subsequent years.

    This practice is not only misleading, but also forces customers to lock themselves into long-term contracts.

    At Zume, we will always display the full monthly price on our website. While we do offer discounts for longer terms, this discount is permanent and will not expire after the first year.

    Does Zume ever have sales or promotions?

    At Zume we never run sales or promotions.

    We believe our current pricing is fair and transparent, and offers excellent value for the quality of the service we provide.

    We want to make sure that all our customers get the best possible deal, regardless of when they sign up.

    Do you have any discount or promo code coupons?

    We currently offer a discount to customers who choose to pre-pay for a period of time, as a thank-you for their loyalty.

    • 2 months free when pre-paying for 1 year
    • 6 months free when pre-paying for 2 years

    These discounts are applied automatically at checkout!

    If you would like to switch your monthly plan to a different cycle to avail of this discount, please get in touch!

  • What is included with Developer Tools?

    Some of our hosting plans include Developer Tools, which provide advanced features for developers.


    Which plans include Developer Tools?

    The following hosting plans include Developer Tools:

    • Website Hosting Ultimate plan
    • All Managed WordPress plans
    • All Business Hosting plans

    What is included with Developer Tools?

    Developer Tools include the following features:

    • Node.js Application Manager: Deploy and manage Node.js applications.
    • Python Application Manager: Deploy and manage Python applications.
    • Ruby Application Manager: Deploy and manage Ruby applications.
    • Git UI: Manage your Git repositories directly from your hosting account, with one-click deployments.
    • SSH Access: Securely access your hosting account via SSH for advanced server management.
  • What are Zume’s Nameservers?

    Zume operates a global anycast network with nameservers in multiple locations around the world. This ensures that your domain is always available and resolves quickly no matter where your visitors are located, as well as providing redundancy in case of a failure.


    Zume’s nameservers

    When you sign up for a hosting package with Zume, you will be provided with the following nameservers:

    ns1.zumedns.com
    ns2.zumedns.com
    

    We use an Anycast network with multiple redundant nameservers across the globe to bring you the best performance no matter where your visitors are.

    Good to know!

    Anycast is a networking approach that routes user requests to the nearest data center in our global network. This ensures faster response times and increased resilience against failures.

    To connect your domain to a hosting package, you must update your domain’s nameservers. The process will vary depending on where your domain is registered.

    Connect your domain registered with Zume

    If your registered your domain with us, your nameservers will already be automatically configured. You can manage your domain in the Client Area.

    You can update your domain’s nameservers by following these steps:

    1. Log in to the Client Area.
    2. Click on the Domains > My Domains menu option.
    Step 2
    1. Click on the domain you want to manage.
    Step 3
    1. Click on the Nameservers tab, select Use default nameservers and click Change nameservers.
    Step 4
    1. Allow up to 24 hours for the changes to propagate through the internet.

    Connect your domain registered with a third-party registrar

    If your domain is with a third-party registrar, you will have to update the domain’s nameservers using their control panel. Please consult their documentation or contact their support team for assistance.

    For your convenience, we have included some common registrar guides below:

  • What does “unlimited storage” mean?

    Some of Zume’s plans include “unlimited” storage. But what exactly does that mean?


    Our unlimited storage plans allow you to run your websites without having to worry about how much disk space you have available. It is not intended to be used for file storage/sharing, backups, archiving, etc.

    How does it work?

    When you order your plan, you will notice that there is actually a storage quota configured. This is there for two reasons:

    1. Prevent faulty software from rapidly filling the storage and causing instability to our platform (eg. misconfigured caching plugins)
    2. Prevent abuse of unlimited storage for non-website hosting purposes, such as for file storage, backups, archiving, etc.

    The following table shows the initial storage quota for each plan:

    PlanInitial Quota
    Business Grow75 GB
    Business Professional100 GB
    Business Advanced250 GB

    What happens when I reach my quota?

    When you near 80% of your quota, you will be able to increase it via the client portal for no additional cost.

    Your request for additional storage will be approved so long as the following conditions are met:

    • You are using the majority of your storage for website hosting.
    • You are not excessively using your storage for file storage, backups, archiving, etc.
    • You are not using your account to effectively resell hosting to other customers. You should use a Reseller account for this purpose.

    What if I need to store backups or files?

    We are more than happy to provide a NAS share for you to store your larger files and backus, and connect this to your hosting account. Prices are competitive at around £1/100GB of storage. Please contact us for more information about this service.

  • My website is down or I can’t log in to emails. What should I do?

    Experiencing website downtime can be frustrating and concerning. If your website is down, there are several steps you can take to diagnose and resolve the issue. In this article, we’ll guide you through the process, starting with checking if your IP address is blocked.


    Step 1: Check the Zume Status Page

    Our infrastructure is monitored 24/7 and any interruptions are posted on our status page. This should be the first place you check if you experience any issues.

    Visit our status page at status.zume.io.

    Step 2: Unblock Your IP Address

    Sometimes, your IP address may be blocked by our firewall due to security measures. To unblock your IP address, follow these steps:

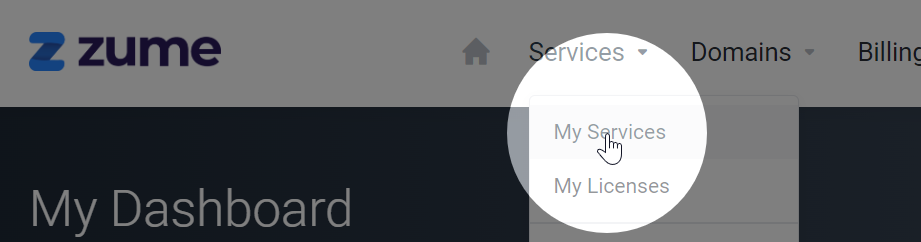
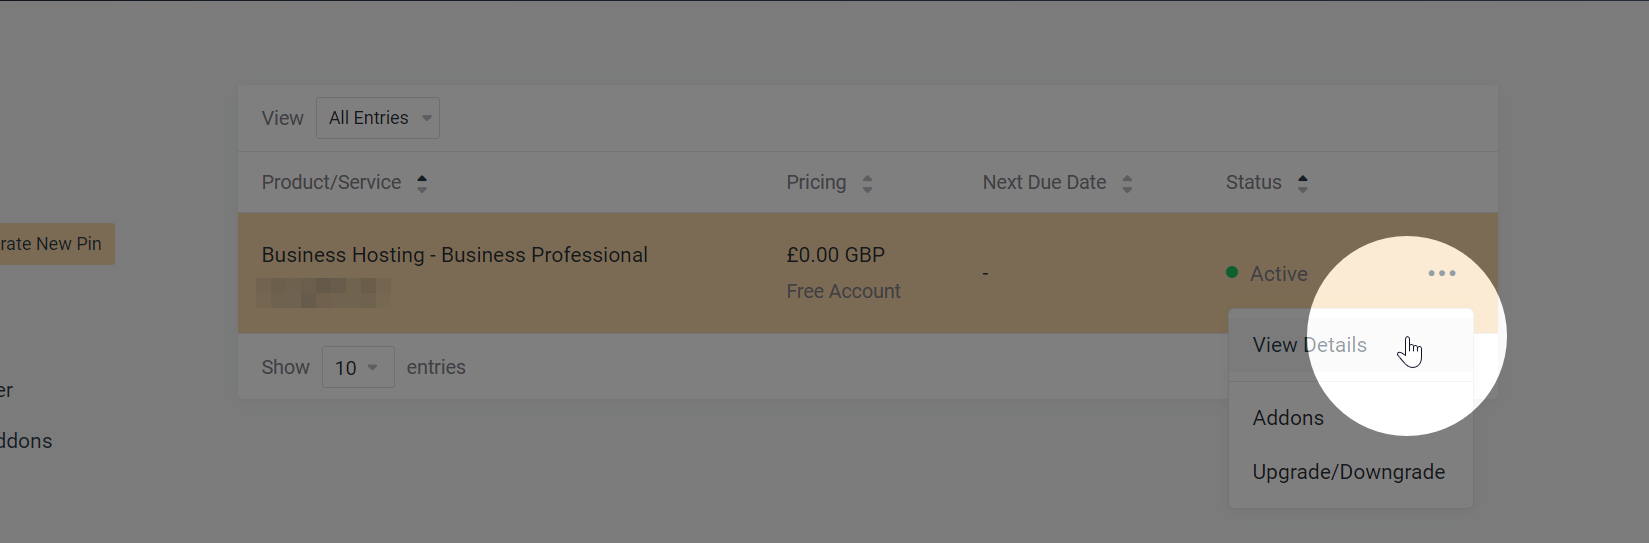
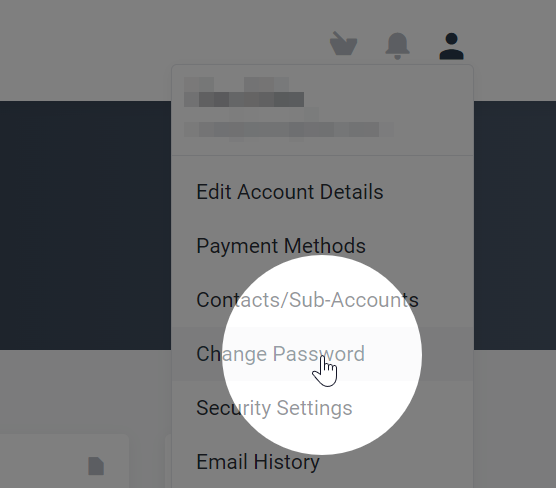
    1. Log into the Zume client area.
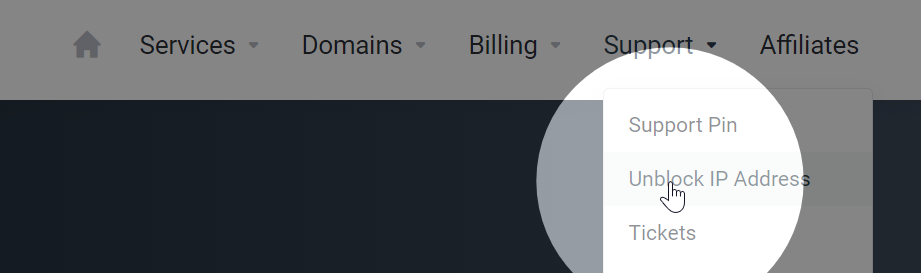
    2. Go to the Unblock IP Address page under the Support dropdown.
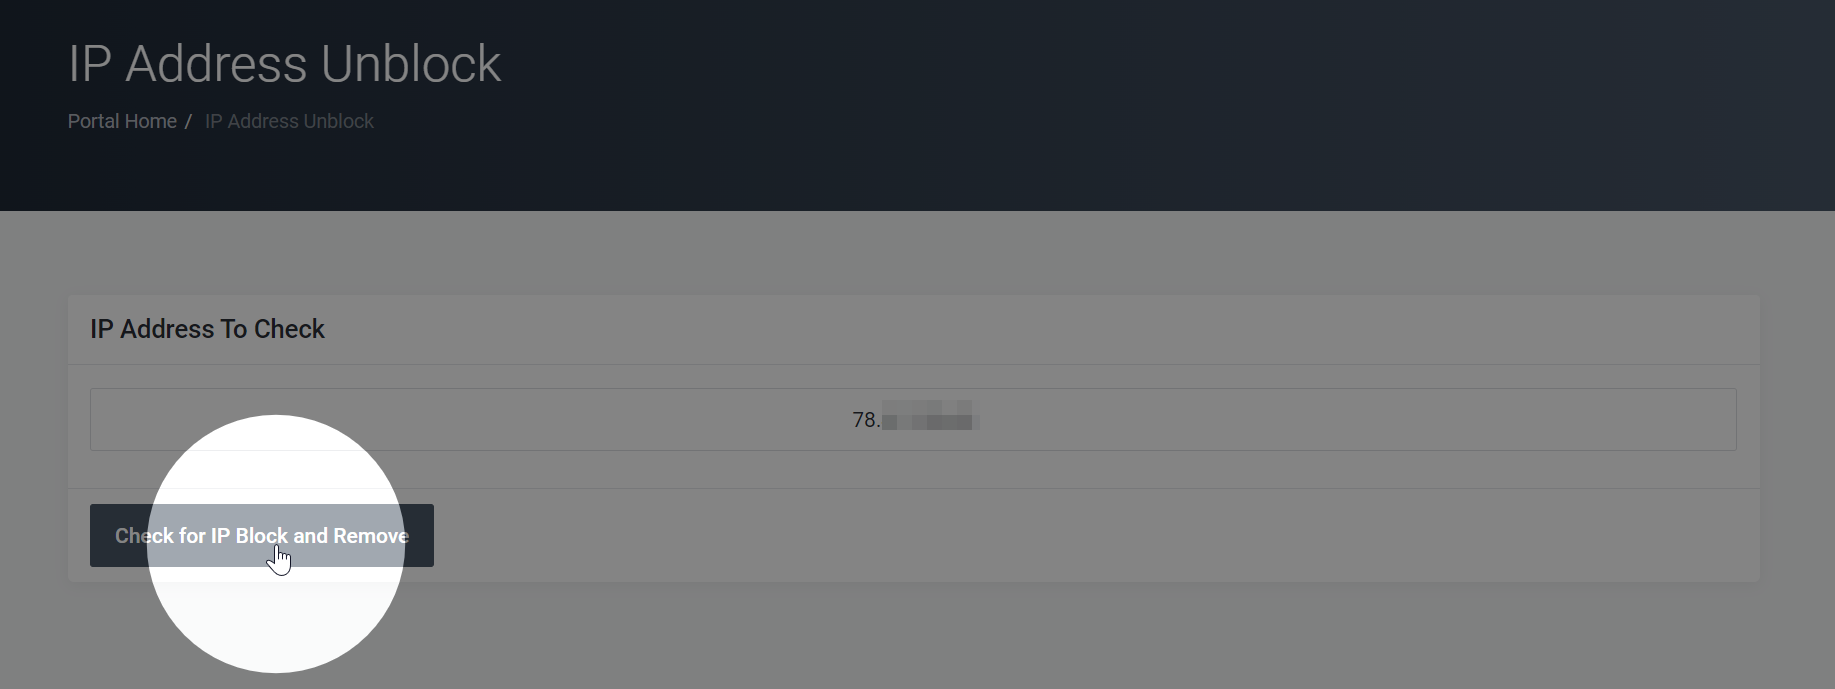
    3. Enter your IP address in the provided field. To find your IP address, you can visit a website like whatismyip.com.
    4. Click the Check for IP Block button. If your IP address was blocked, you should now have access to your website.

    If your website is still down after unblocking your IP address, proceed to the next step.

    Learn how to unblock your IP address from our firewall.

    Step 3: Check Your Domain and Hosting Expiration Dates

    Ensure your domain and hosting services have not expired. Log in to your domain registrar and hosting provider accounts to verify the expiration dates and renew any expired services.

    You can check your domain expiry using the MX Toolbox Whois Lookup Tool.

    Step 4: Verify Your DNS Settings Are Correct

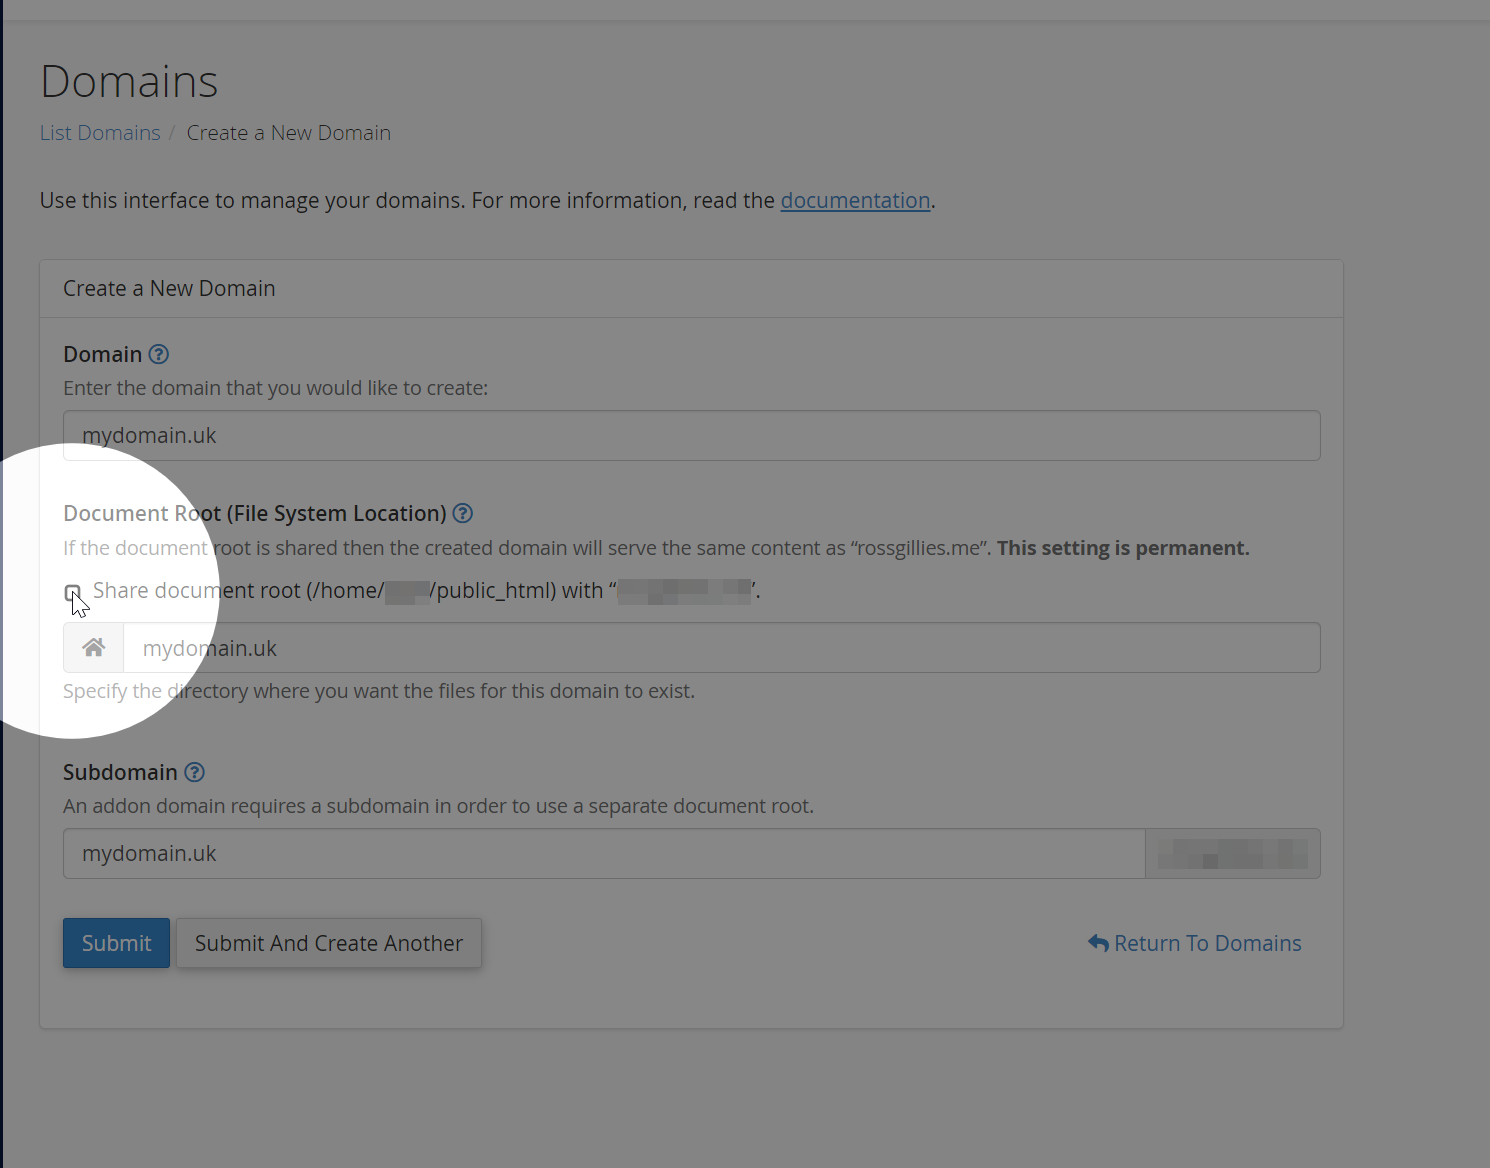
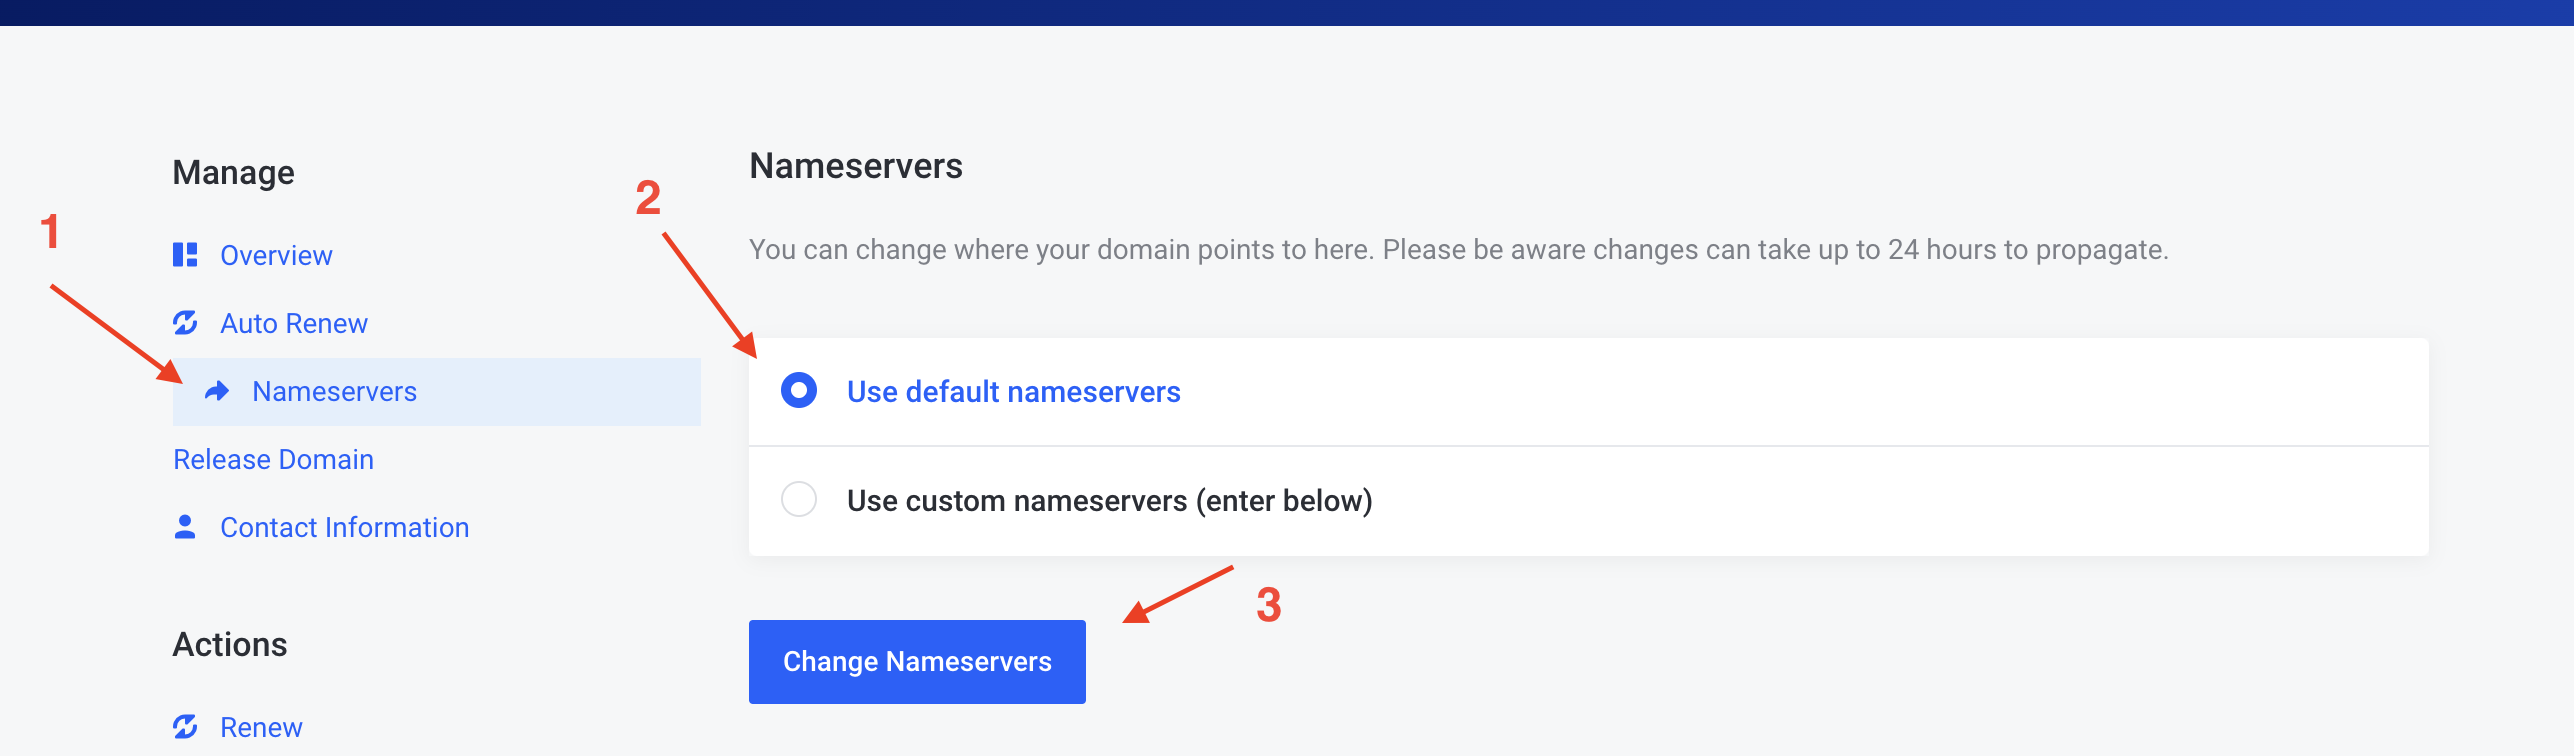
    Incorrect DNS settings can cause your website to be unreachable. Check your domain’s DNS settings at your domain registrar, ensuring the nameservers are pointing to your hosting provider. If you’ve recently changed your nameservers, allow up to 48 hours for DNS propagation.

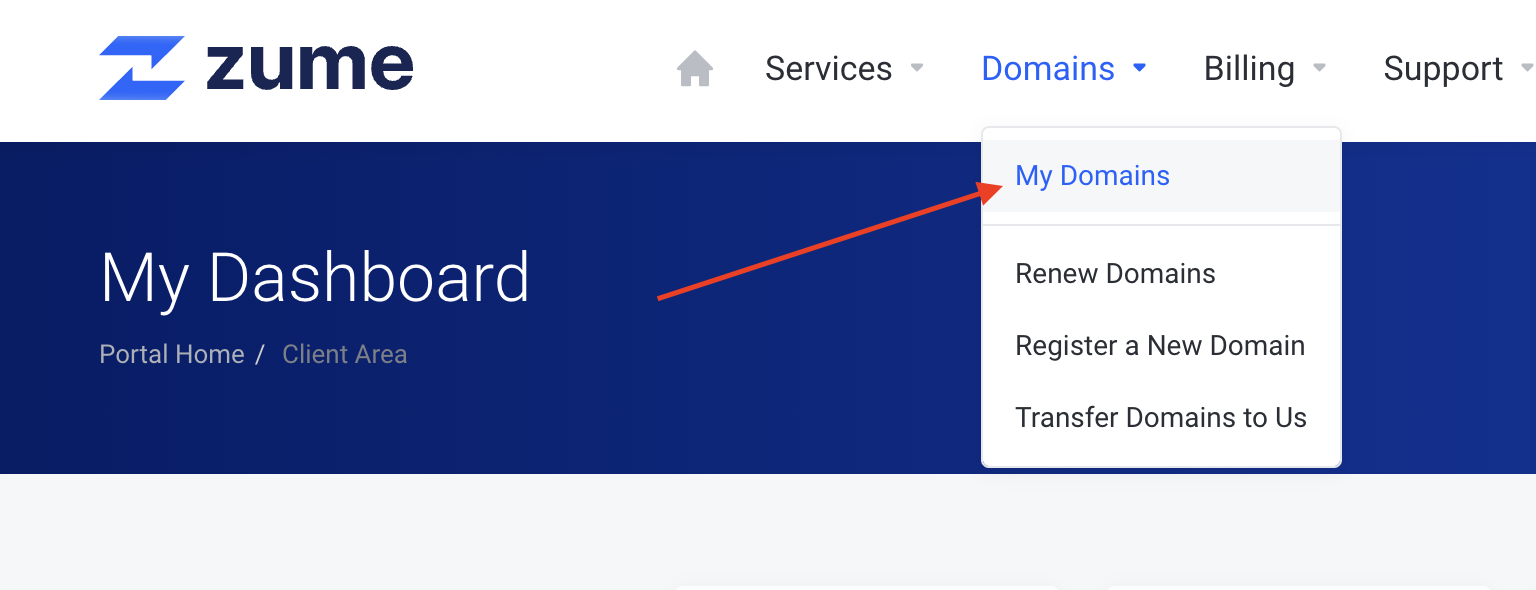
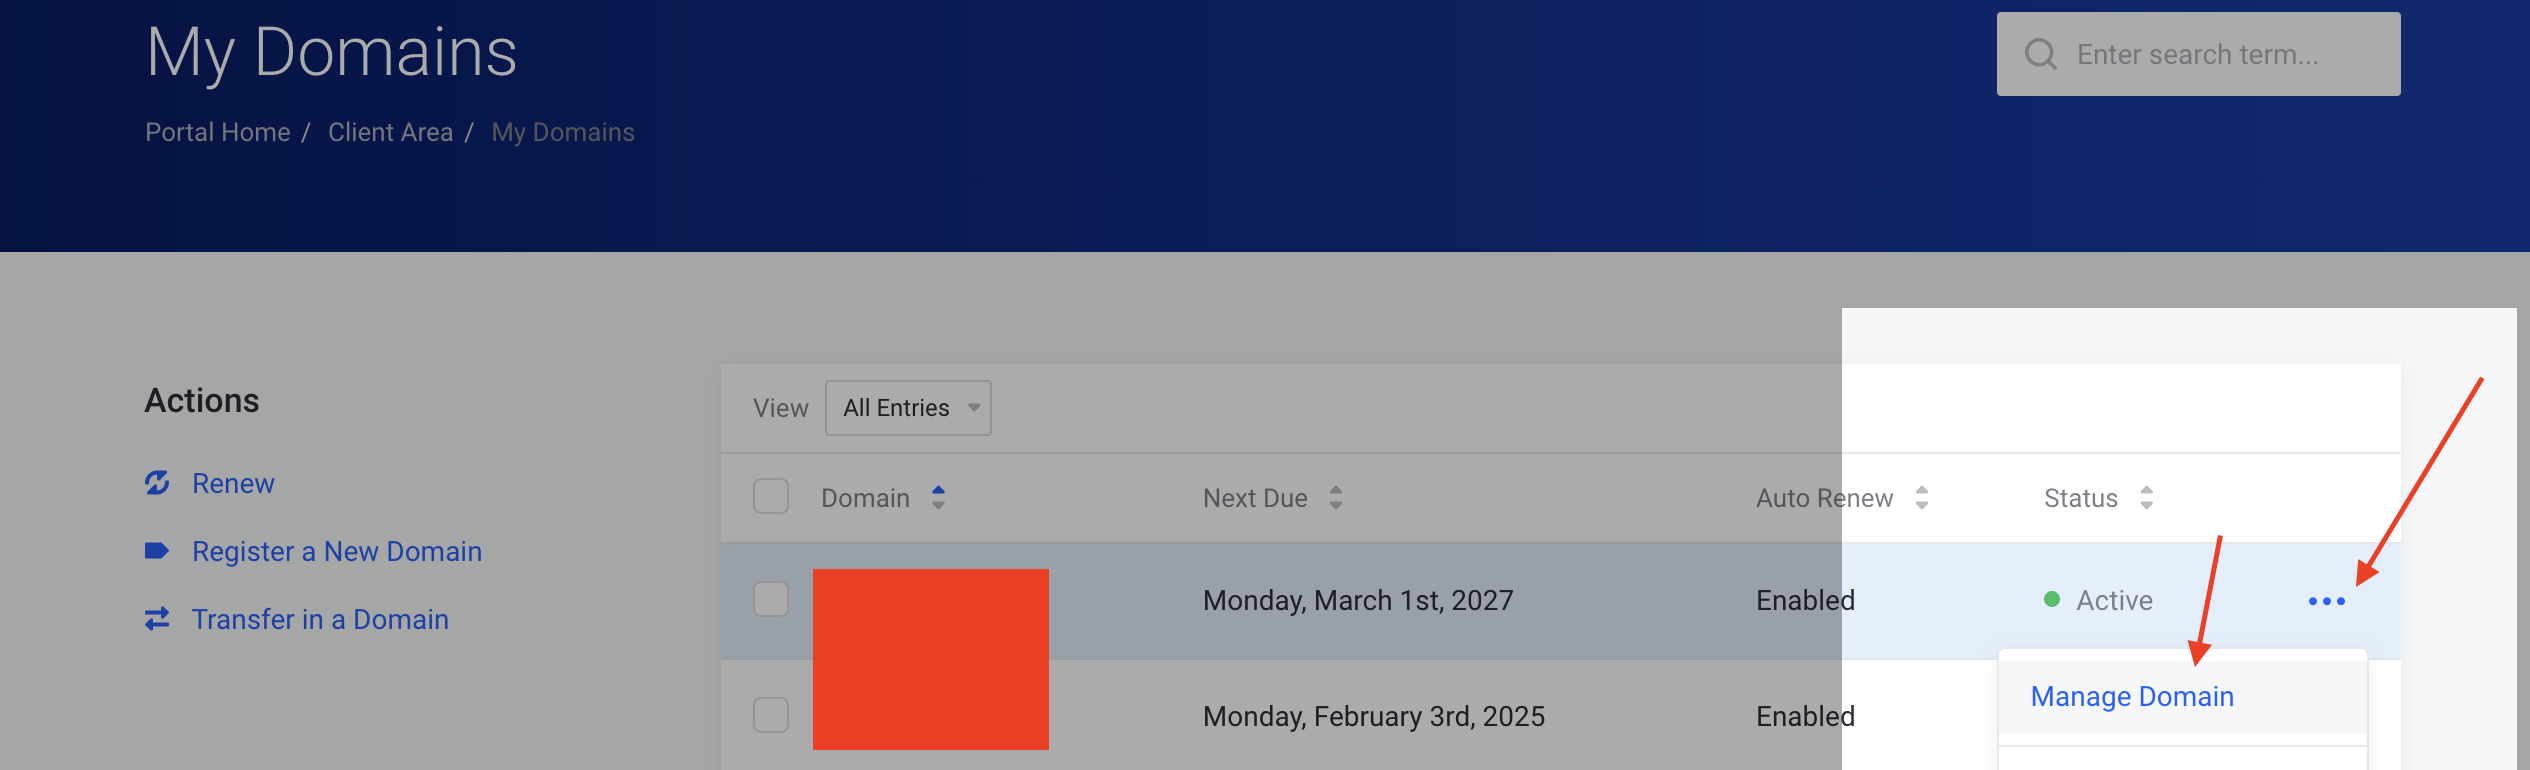
    You should ensure your domain is using Zume’s nameservers.

    Step 5: Test Your Website on Multiple Devices and Networks

    Try accessing your website using different devices, browsers, and networks to determine if the issue is localised.

    You can use a tool such as Down For Everyone or Just Me.

    Step 6: Contact Zume’s Support Team

    If you’re unable to resolve the issue yourself, contact Zume’s support team for assistance. Provide them with any relevant information, such as error messages, recent changes to your website, and steps you’ve already taken to troubleshoot the issue. The agent may ask you to complete the steps listed in this article, so please confirm you have already done so in the ticket.

  • How to change or reset your Client Area password

    This guide will walk you through how to change or reset your Zume Client Area password. Please note this is different to your cPanel password. Learn how to reset your cPanel password.


    If you know your current password

    If you know your current password and want to change it, follow these steps.

    1. Log into the client area

    Visit the client area and log in using your email address and password.

    2. Click the user icon in the top right and click Change Password

    3. Enter your old and new passwords and click Save Changes


    If you do not know your current password

    If you have forgotten your password and need to reset it, follow these steps.

    1. Go to the Zume password reset page

    Visit the password reset page and enter your email address.

    2. Enter your email address and click Submit

    Please be patient when waiting for the password reset email. Only submit this request once. Submitting multiple requests will invalidate prior reset requests and will not speed up the process.

    If you see a 404 page like this, it means the password reset link expired or was invalidated by submitting a new request. Please ensure you are clicking the link in the most recent email or request a new link.

    4. Enter your new password and click Save Changes

    5. Log in to your account using the new password

    Visit the client area and log in using your email address and new password.