Overdue accounts will be suspended within 3 days of non-payment, and terminated within 14 days.
Author: zume
-
Why is my order status “Awaiting Manual Review”
Due to high levels of online fraudulent activity, as a precaution, we may review your order manually and/or require you to provide additional identification before your order is accepted and provisioned.
If your order marked for manual review is not set up within 30 minutes, please open a ticket here.
The identification is used only to verify your identity, and your ID will be deleted as soon as verification is complete.
Should you be asked to provide additional identification, we accept the following types:
- Passport
- Driving License
- Other government-issued identification
You may cover information such as the ID photo, sex and date of birth. We must be able to see the full name, address, document ID number and expiry date.
To prevent the use of stolen credit cards, we may also ask for a photograph of the card used for payment. You may cover up the card, except for:
- Last 4 digits
- Cardholder’s full name
- Expiry date
If you refuse to provide ID when requested, your order will be cancelled and refunded in full.
-
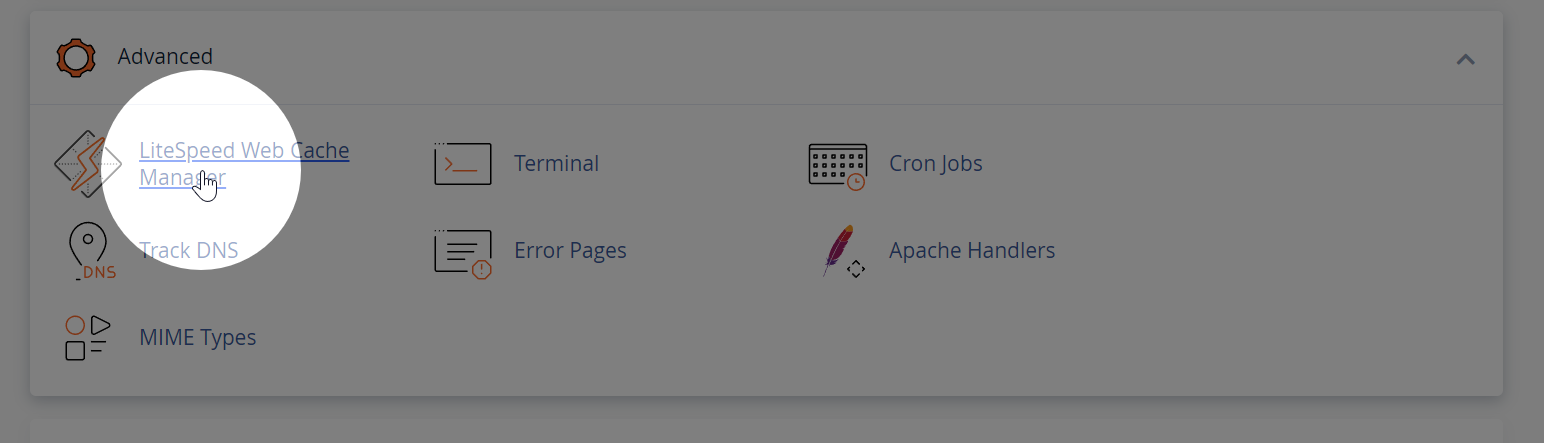
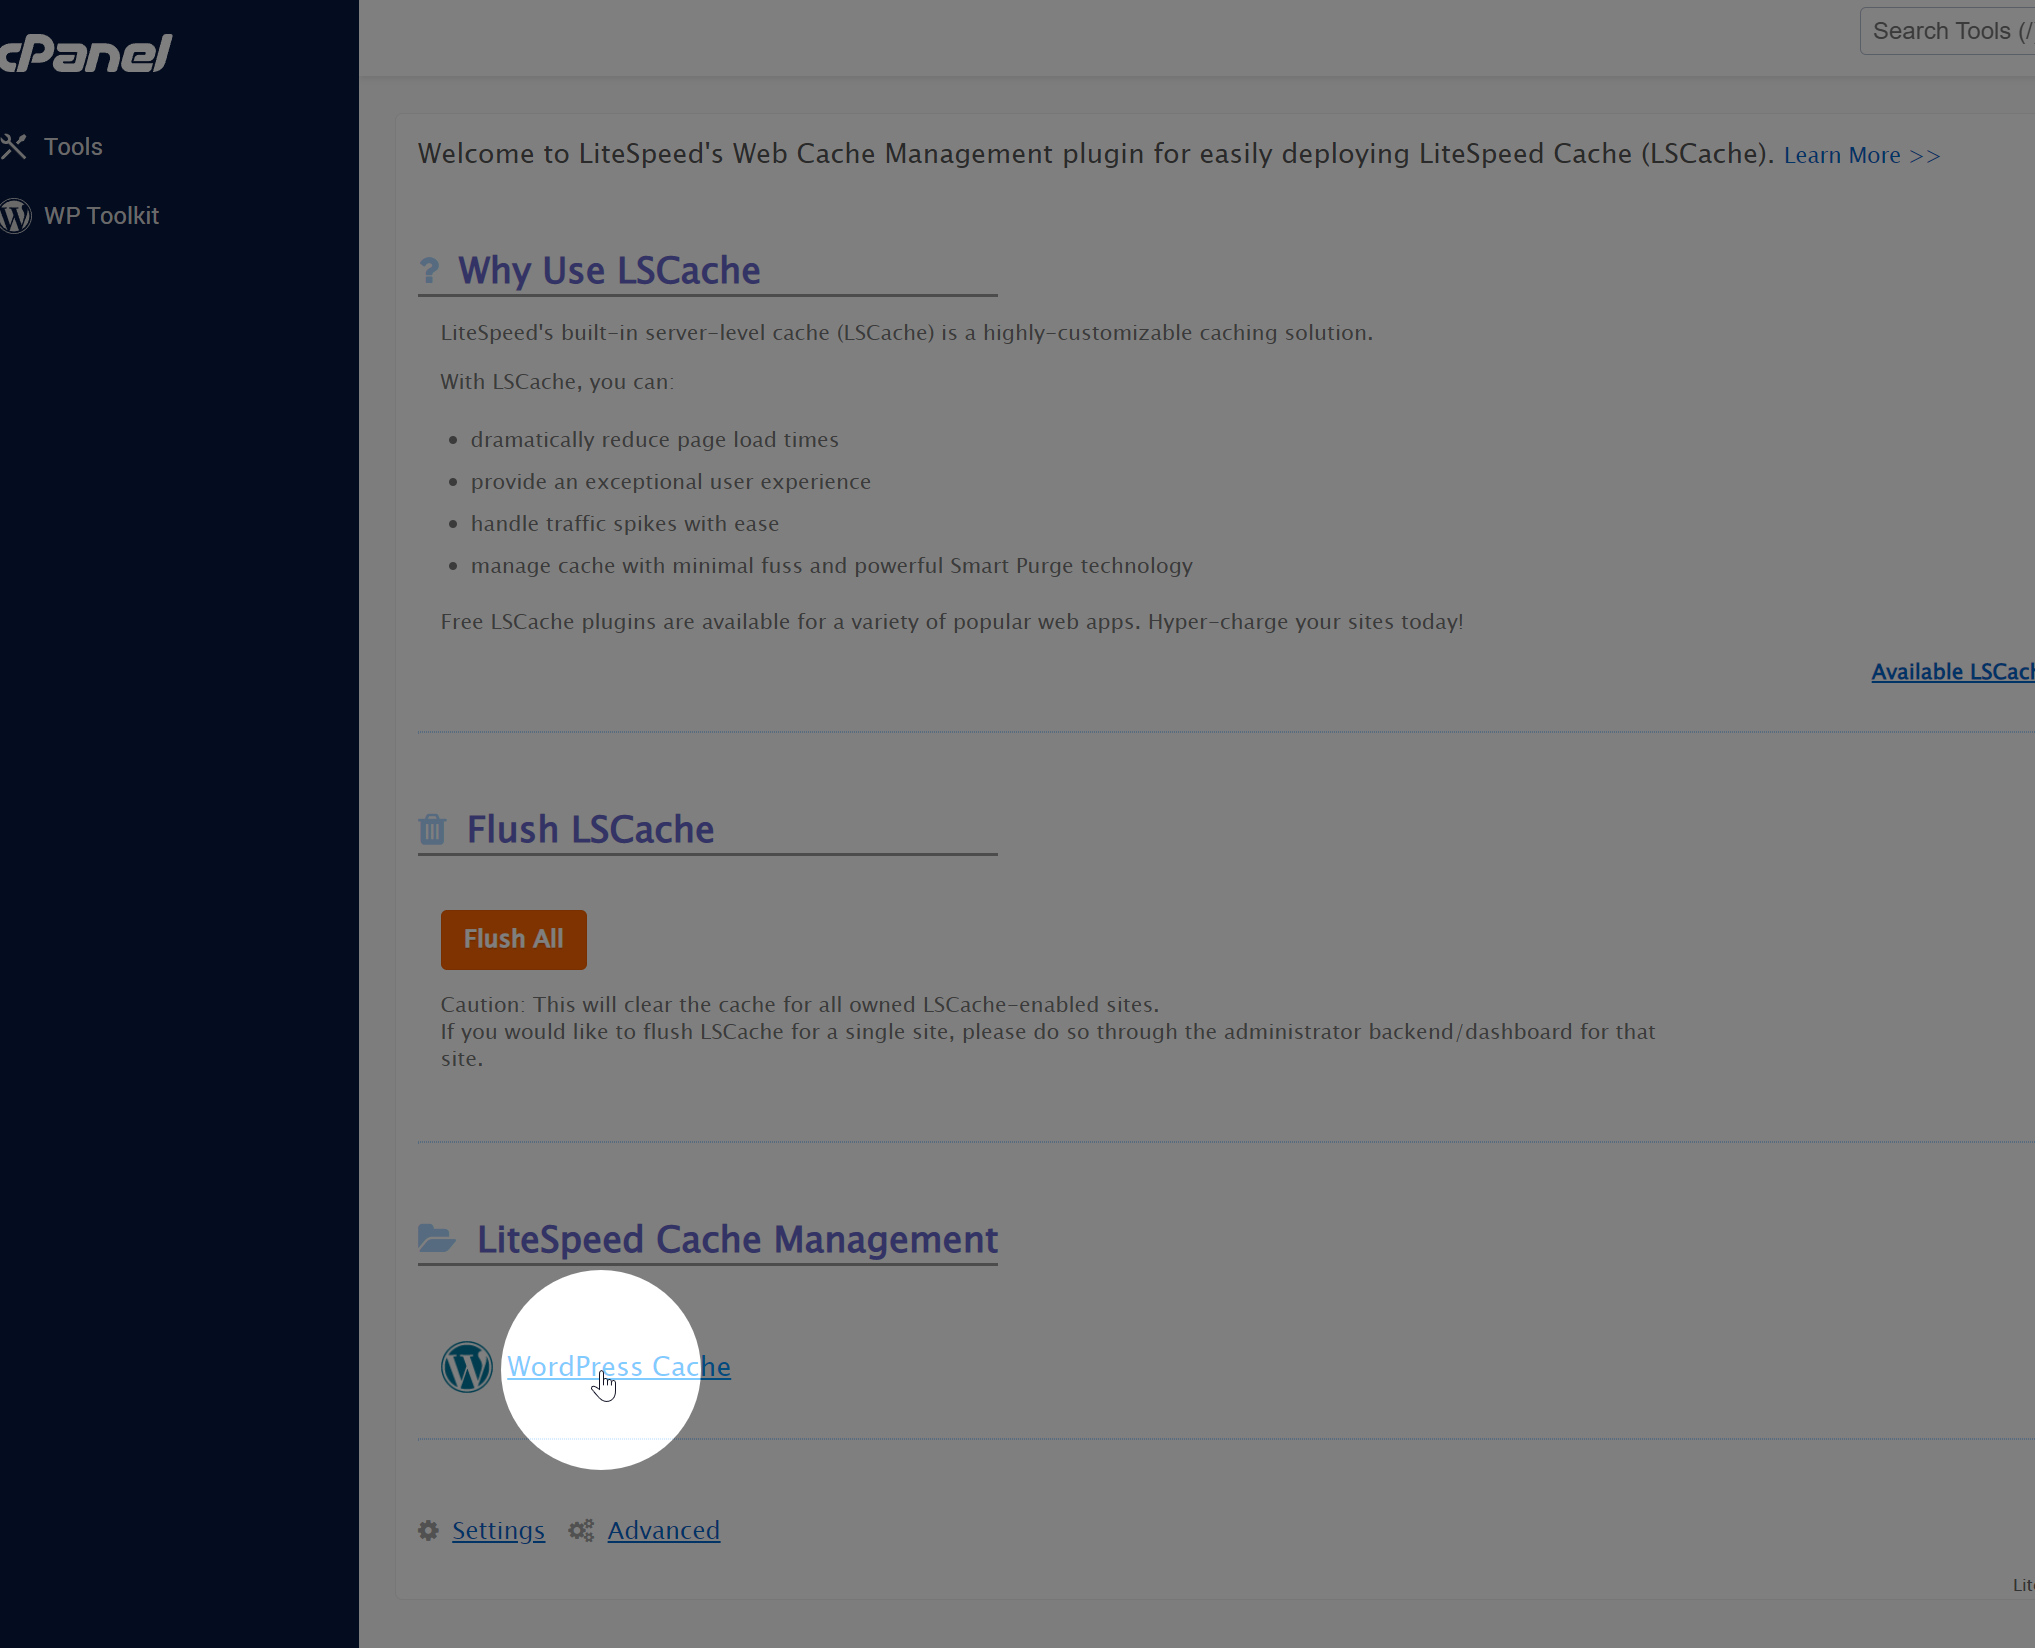
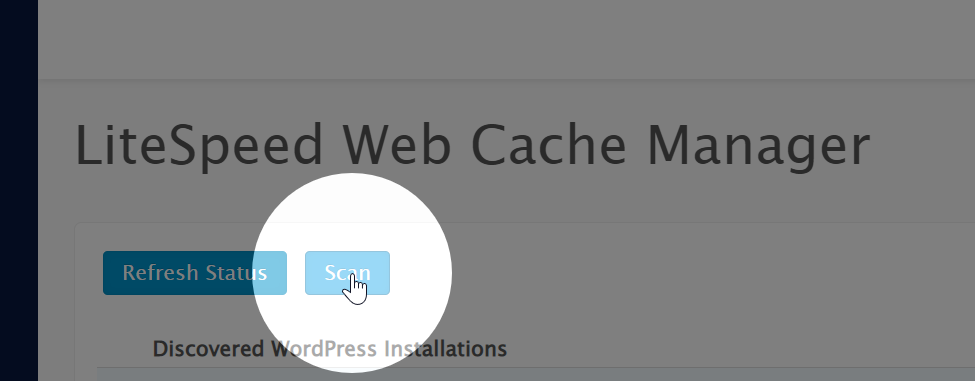
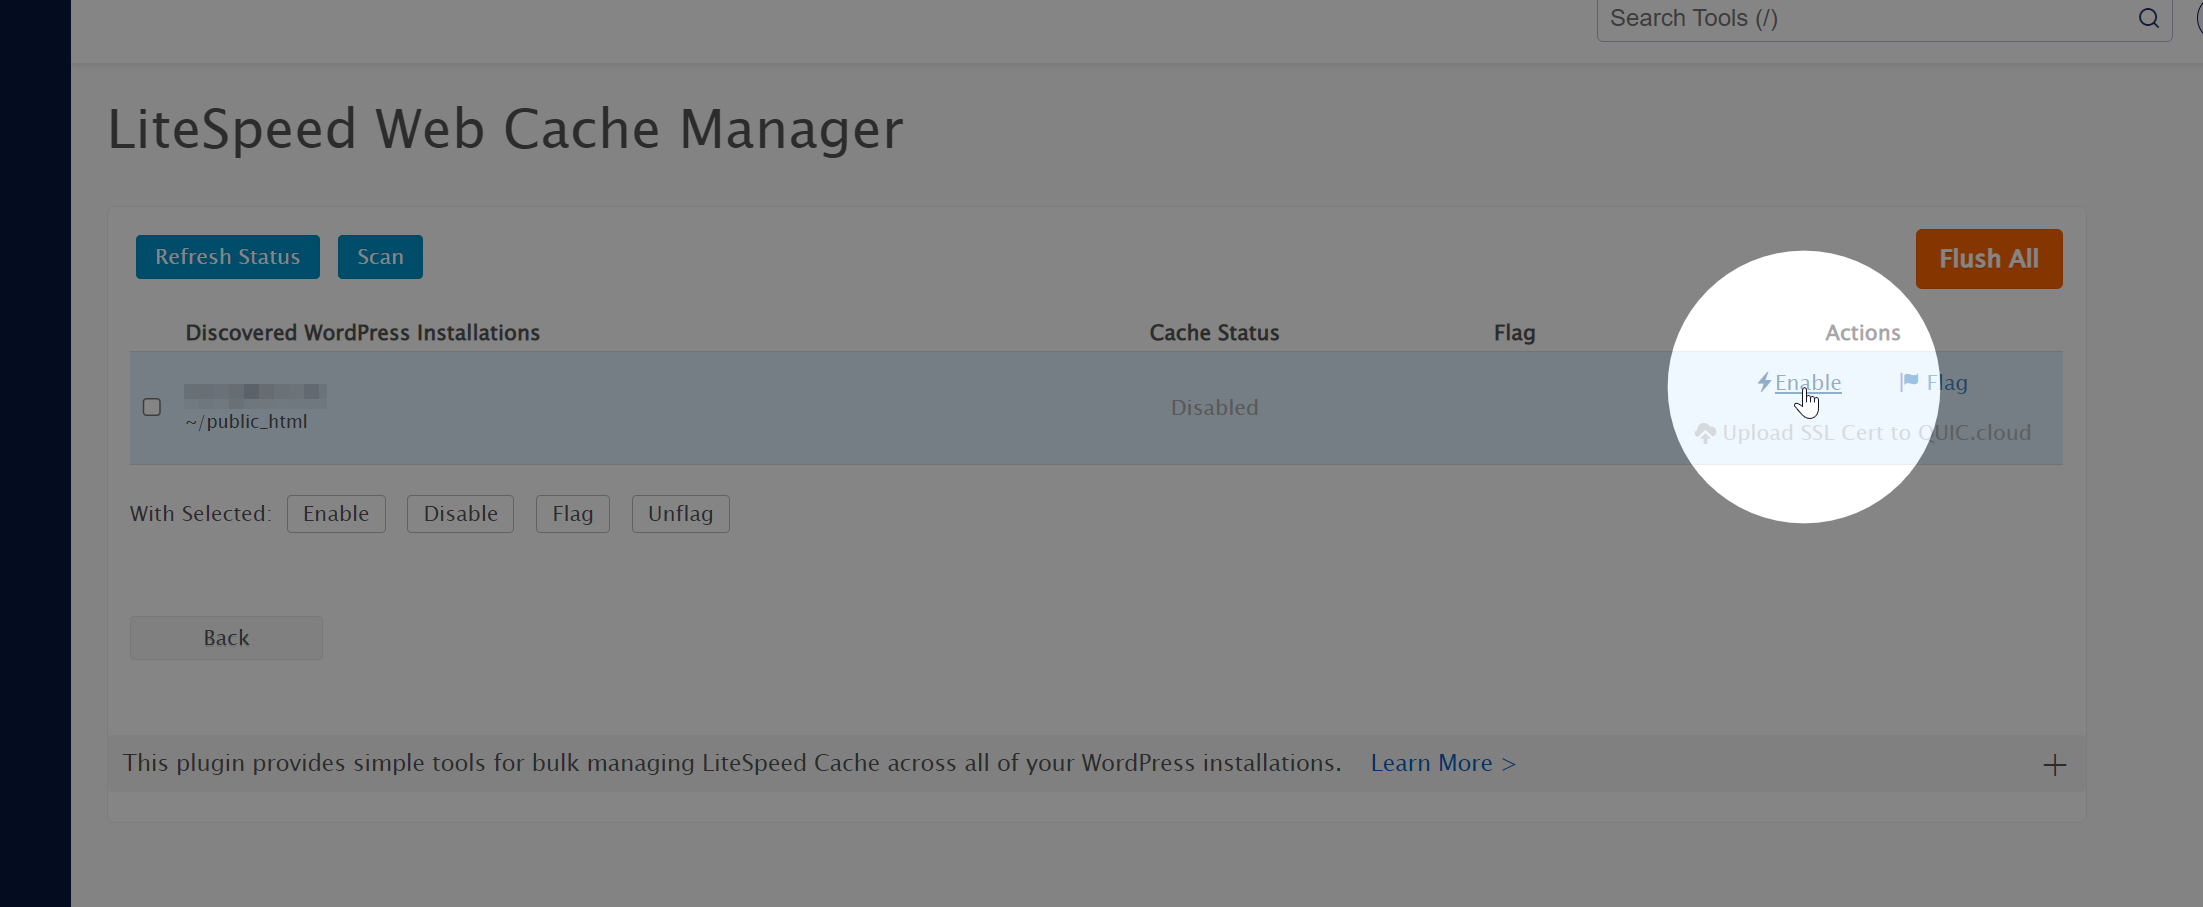
How to enable caching on WordPress
You should uninstall all existing caching plugins from your WordPress admin area. Examples include WPRocket, W3 Total Cache, Hummingbird etc.
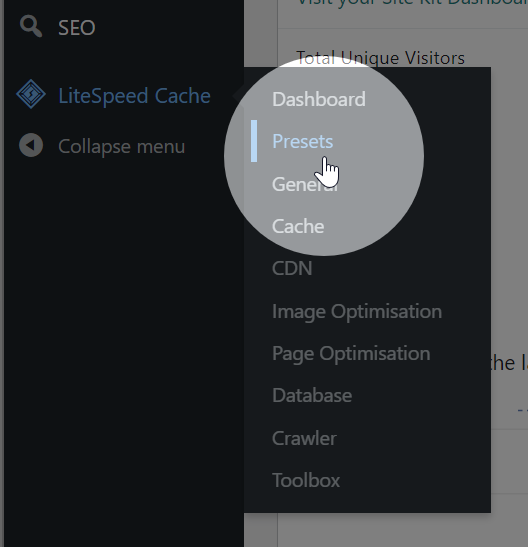
Log into cPanel and click on the LiteSpeed Web Cache Manager link.
Click WordPress Cache.
Click Scan to detect your WordPress installations.
Click Enable on the installations that you wish to enable caching for.
If you get an error, please double check that all existing cache plugins are disabled and deleted.
In your WordPress admin area, you can now manage the cache configuration.
We recommend applying one of the presets for optimal configuration.
-
How to create a staging site on your Managed WordPress Hosting
Staging sites are useful for testing changes to your website before they are live. Zume’s Managed WordPress Hosting allows you to create a staging site for your WordPress website, so you can test changes before they are live, and deploy in a single click.
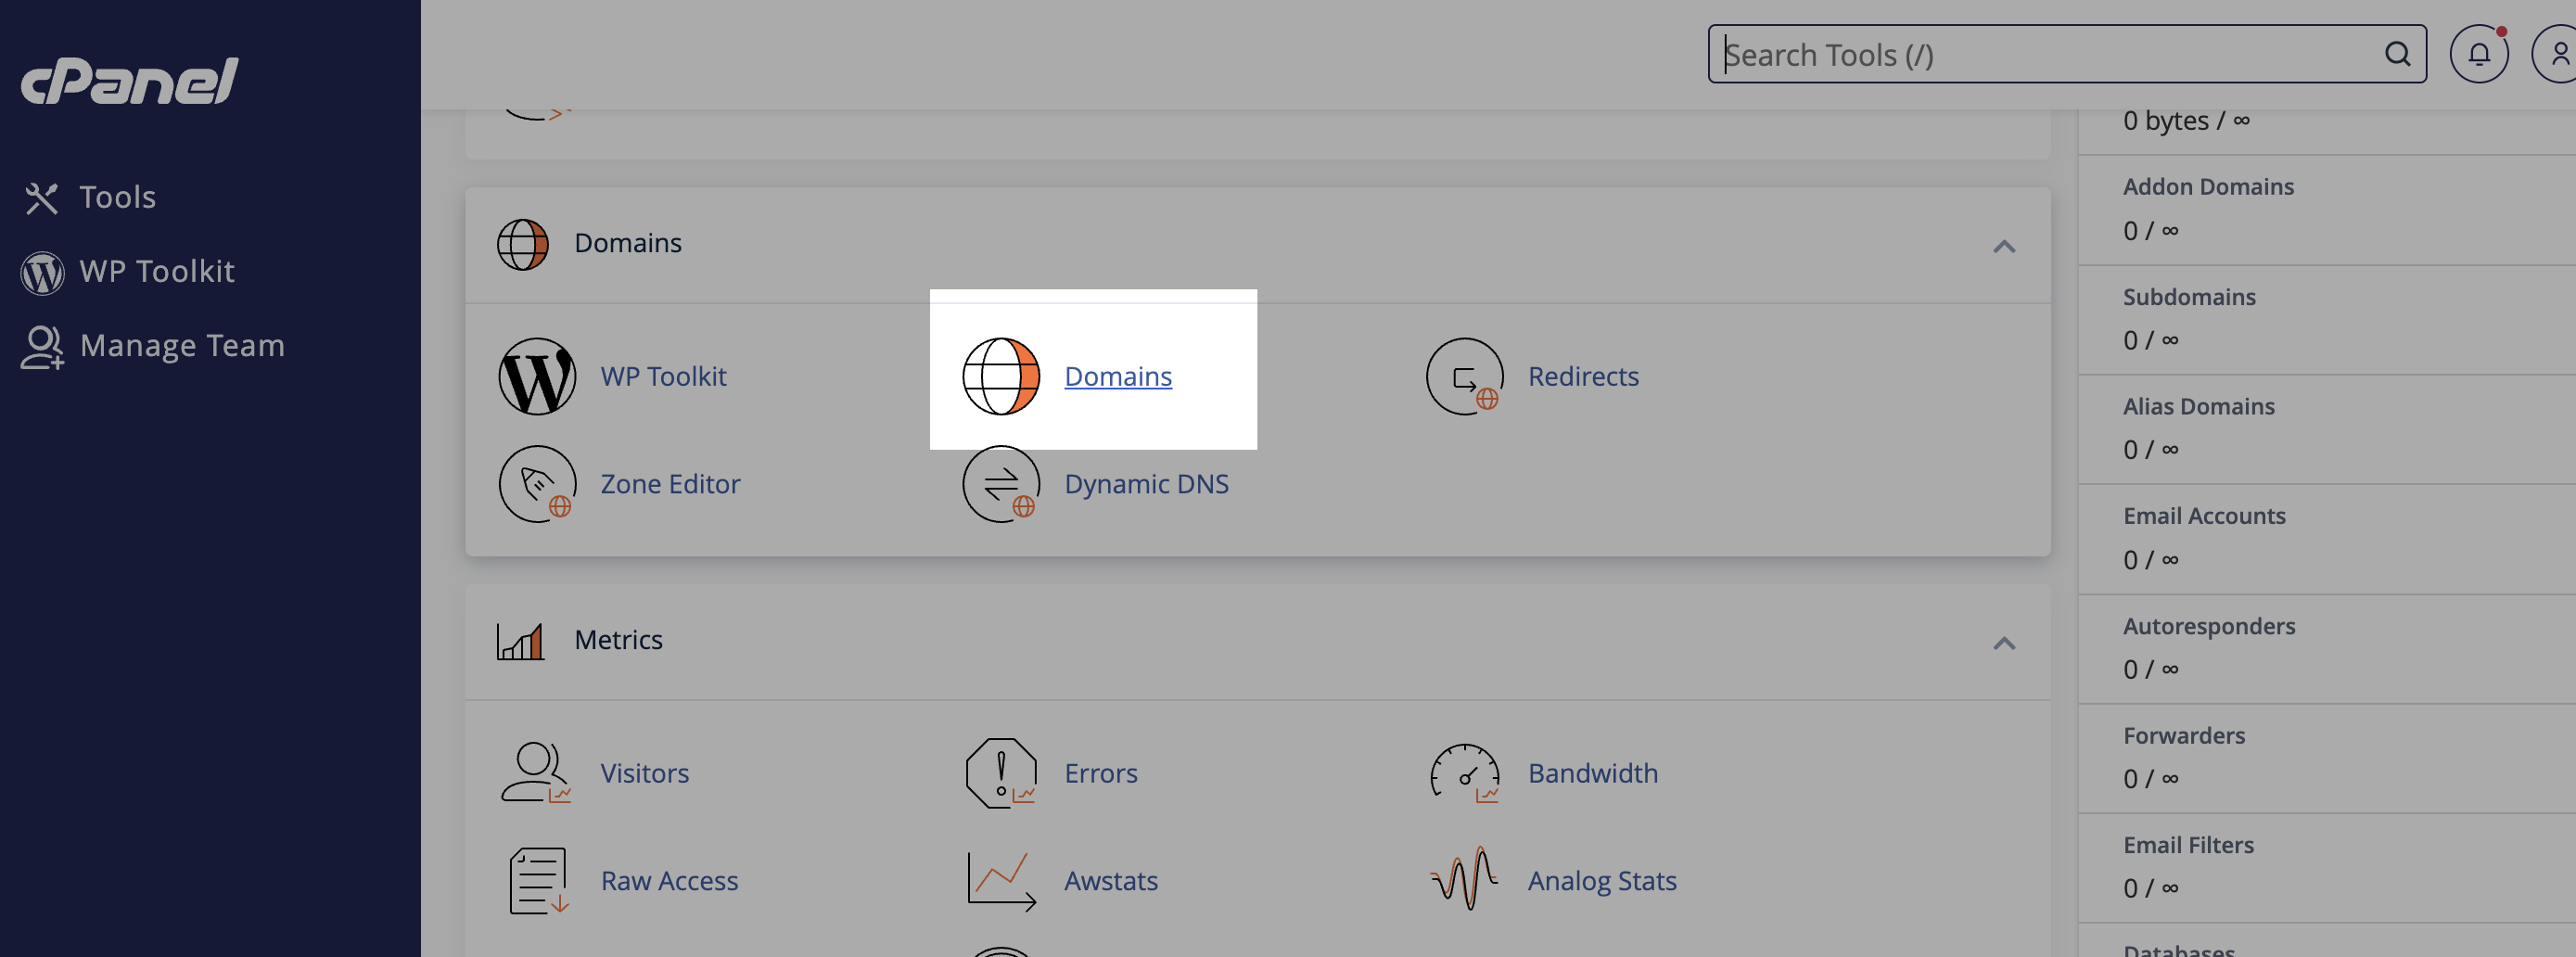
Log in to cPanel
Add the staging domain
- Scroll to the “Domains” section in cPanel and click the “Domains” menu option.
- Click “Create a New Domain”
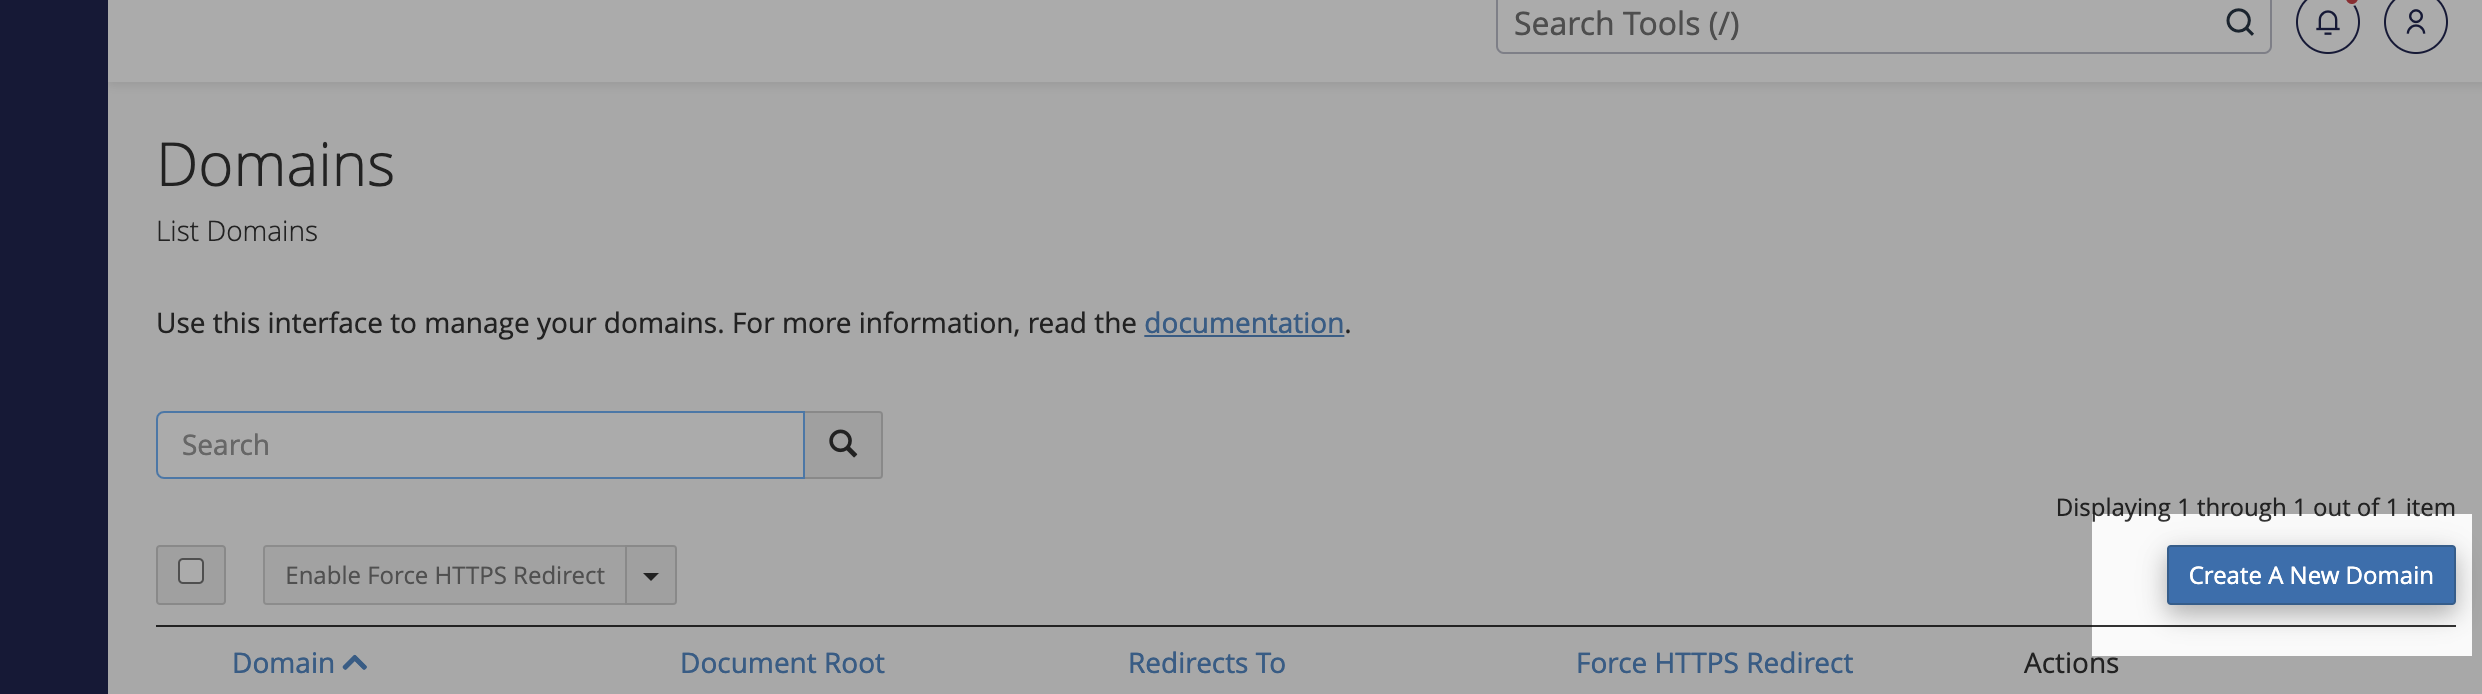
- Enter your desired staging domain name, and click “Submit”.
Make sure you uncheck the ‘Share document root’ checkbox!

Clone the live site
- Navigate to the “WP Toolkit” option on the left-hand menu.
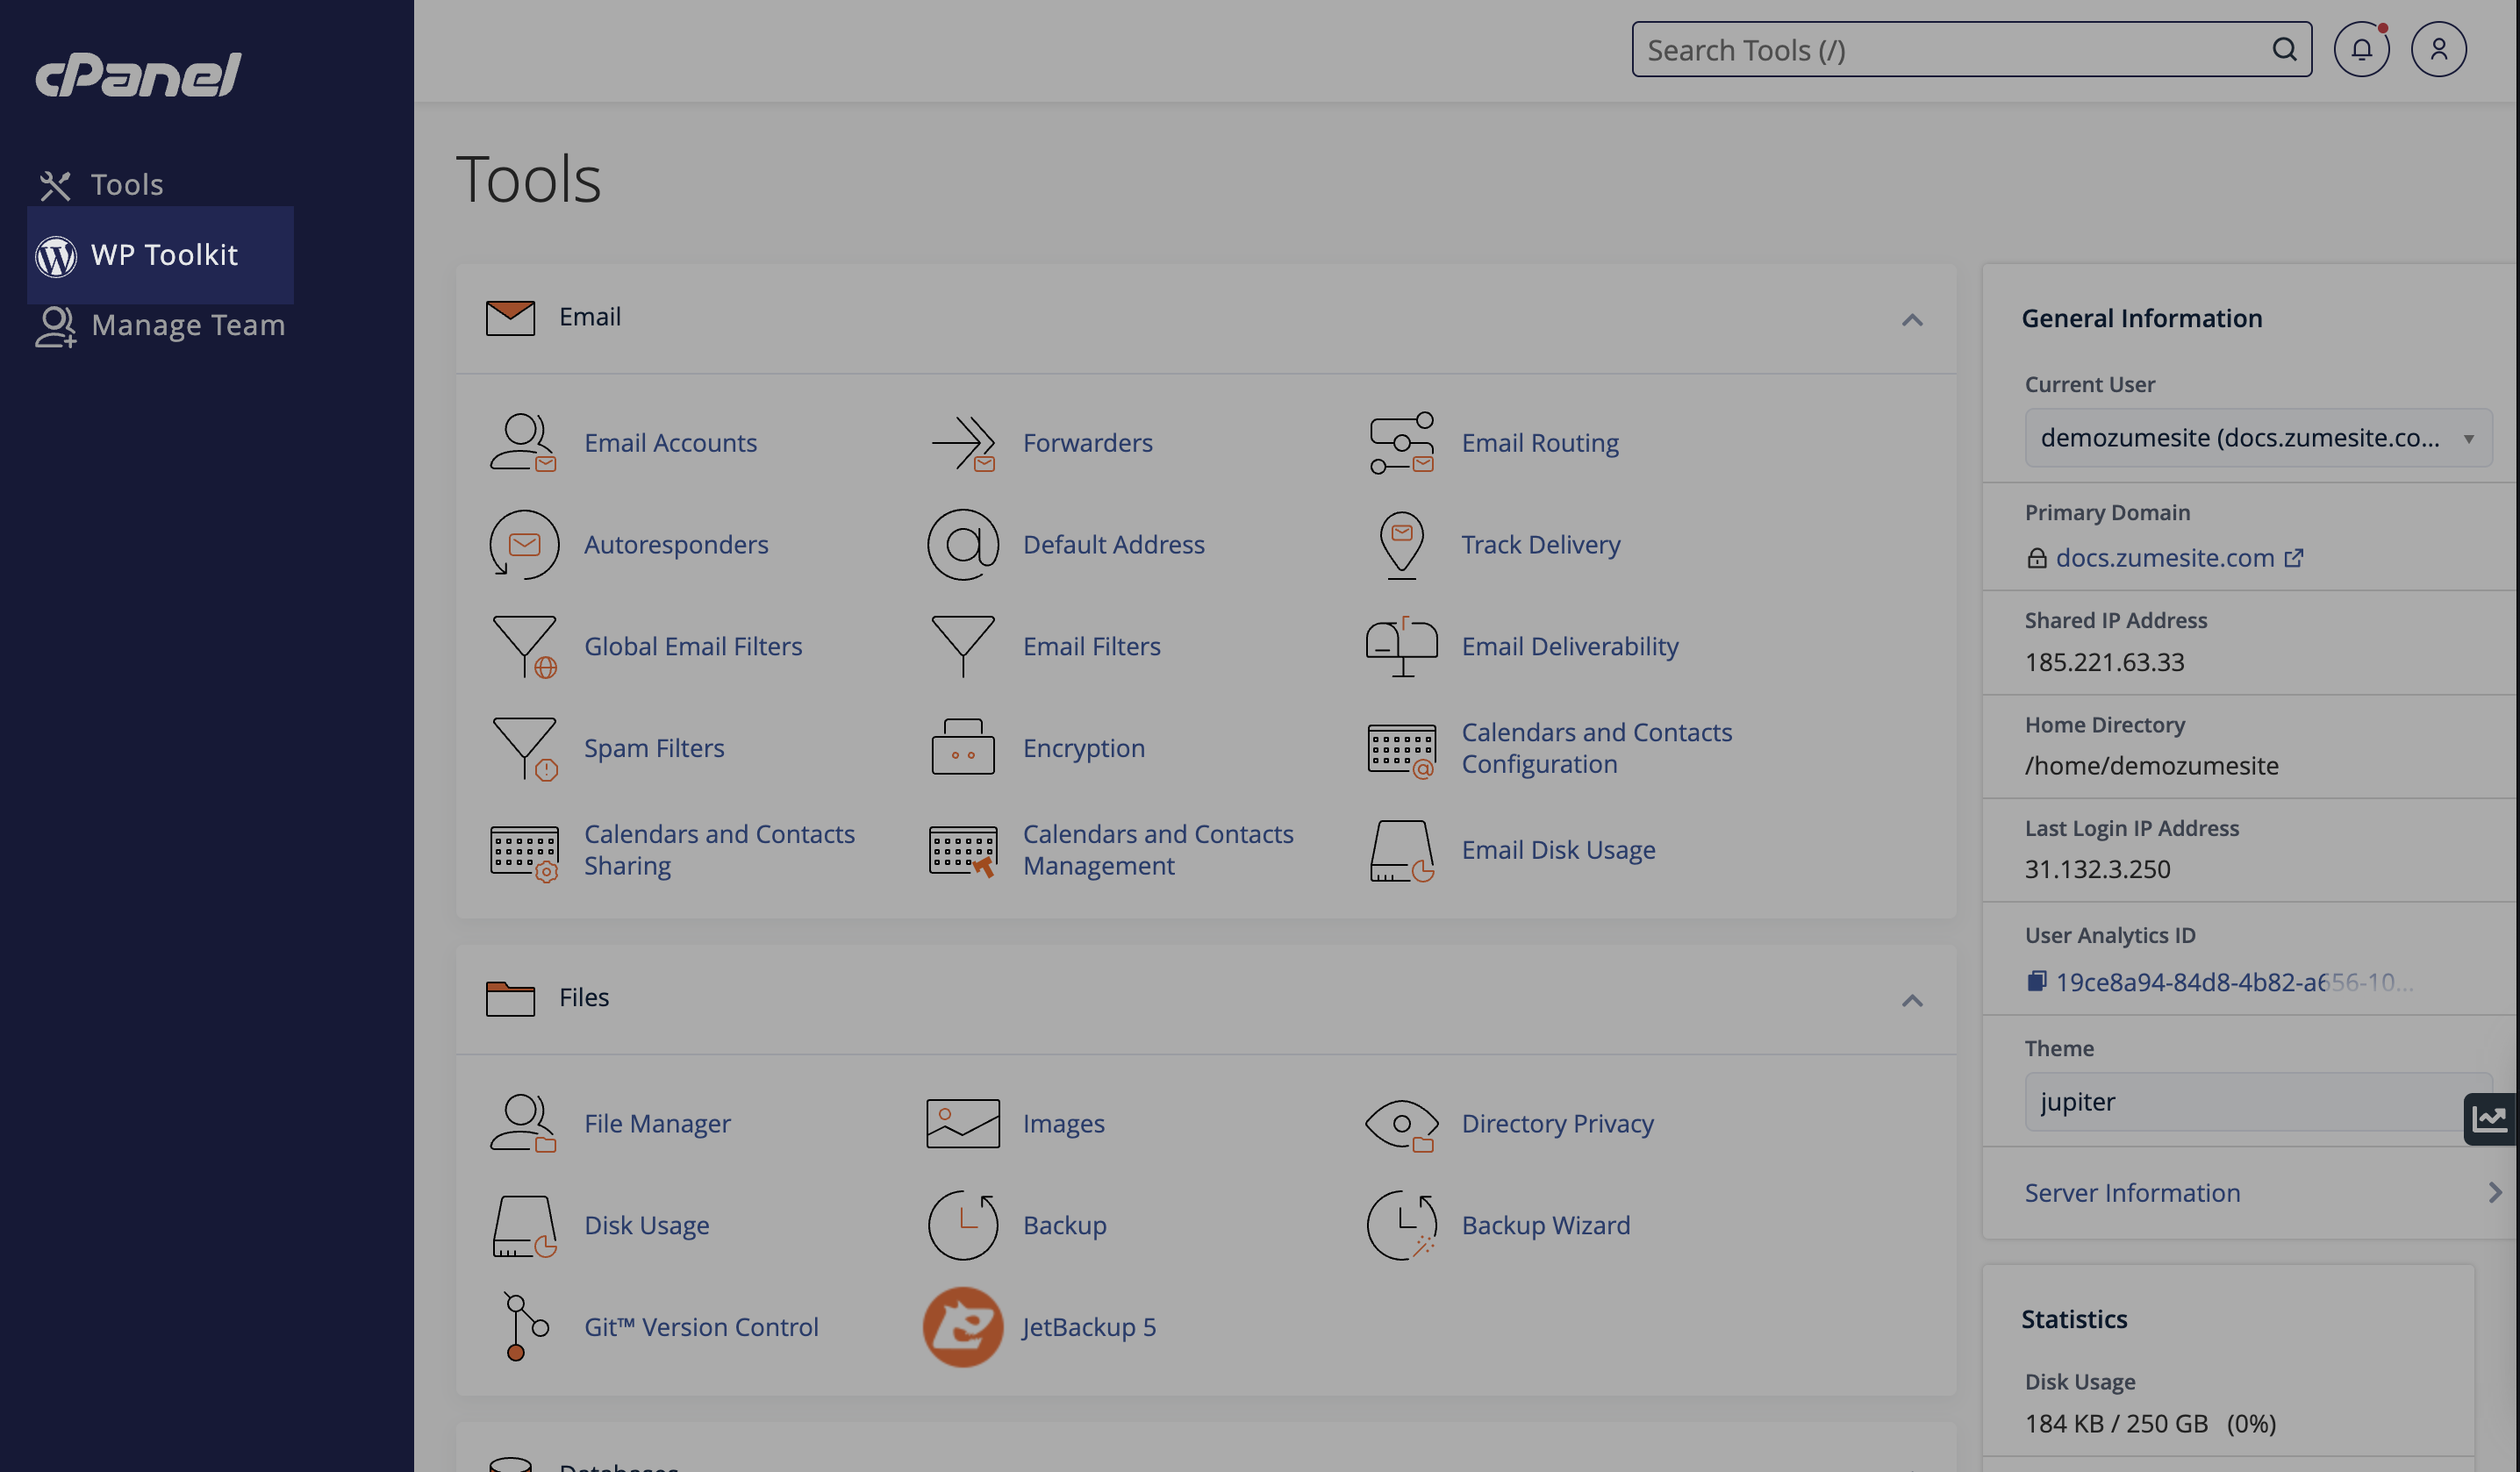
- Click the “Clone” button.

- Click the “Use existing domain” option, and select the domain you just created. Alternatively, you can generate a new domain by selecting the “Create subdomain” option.
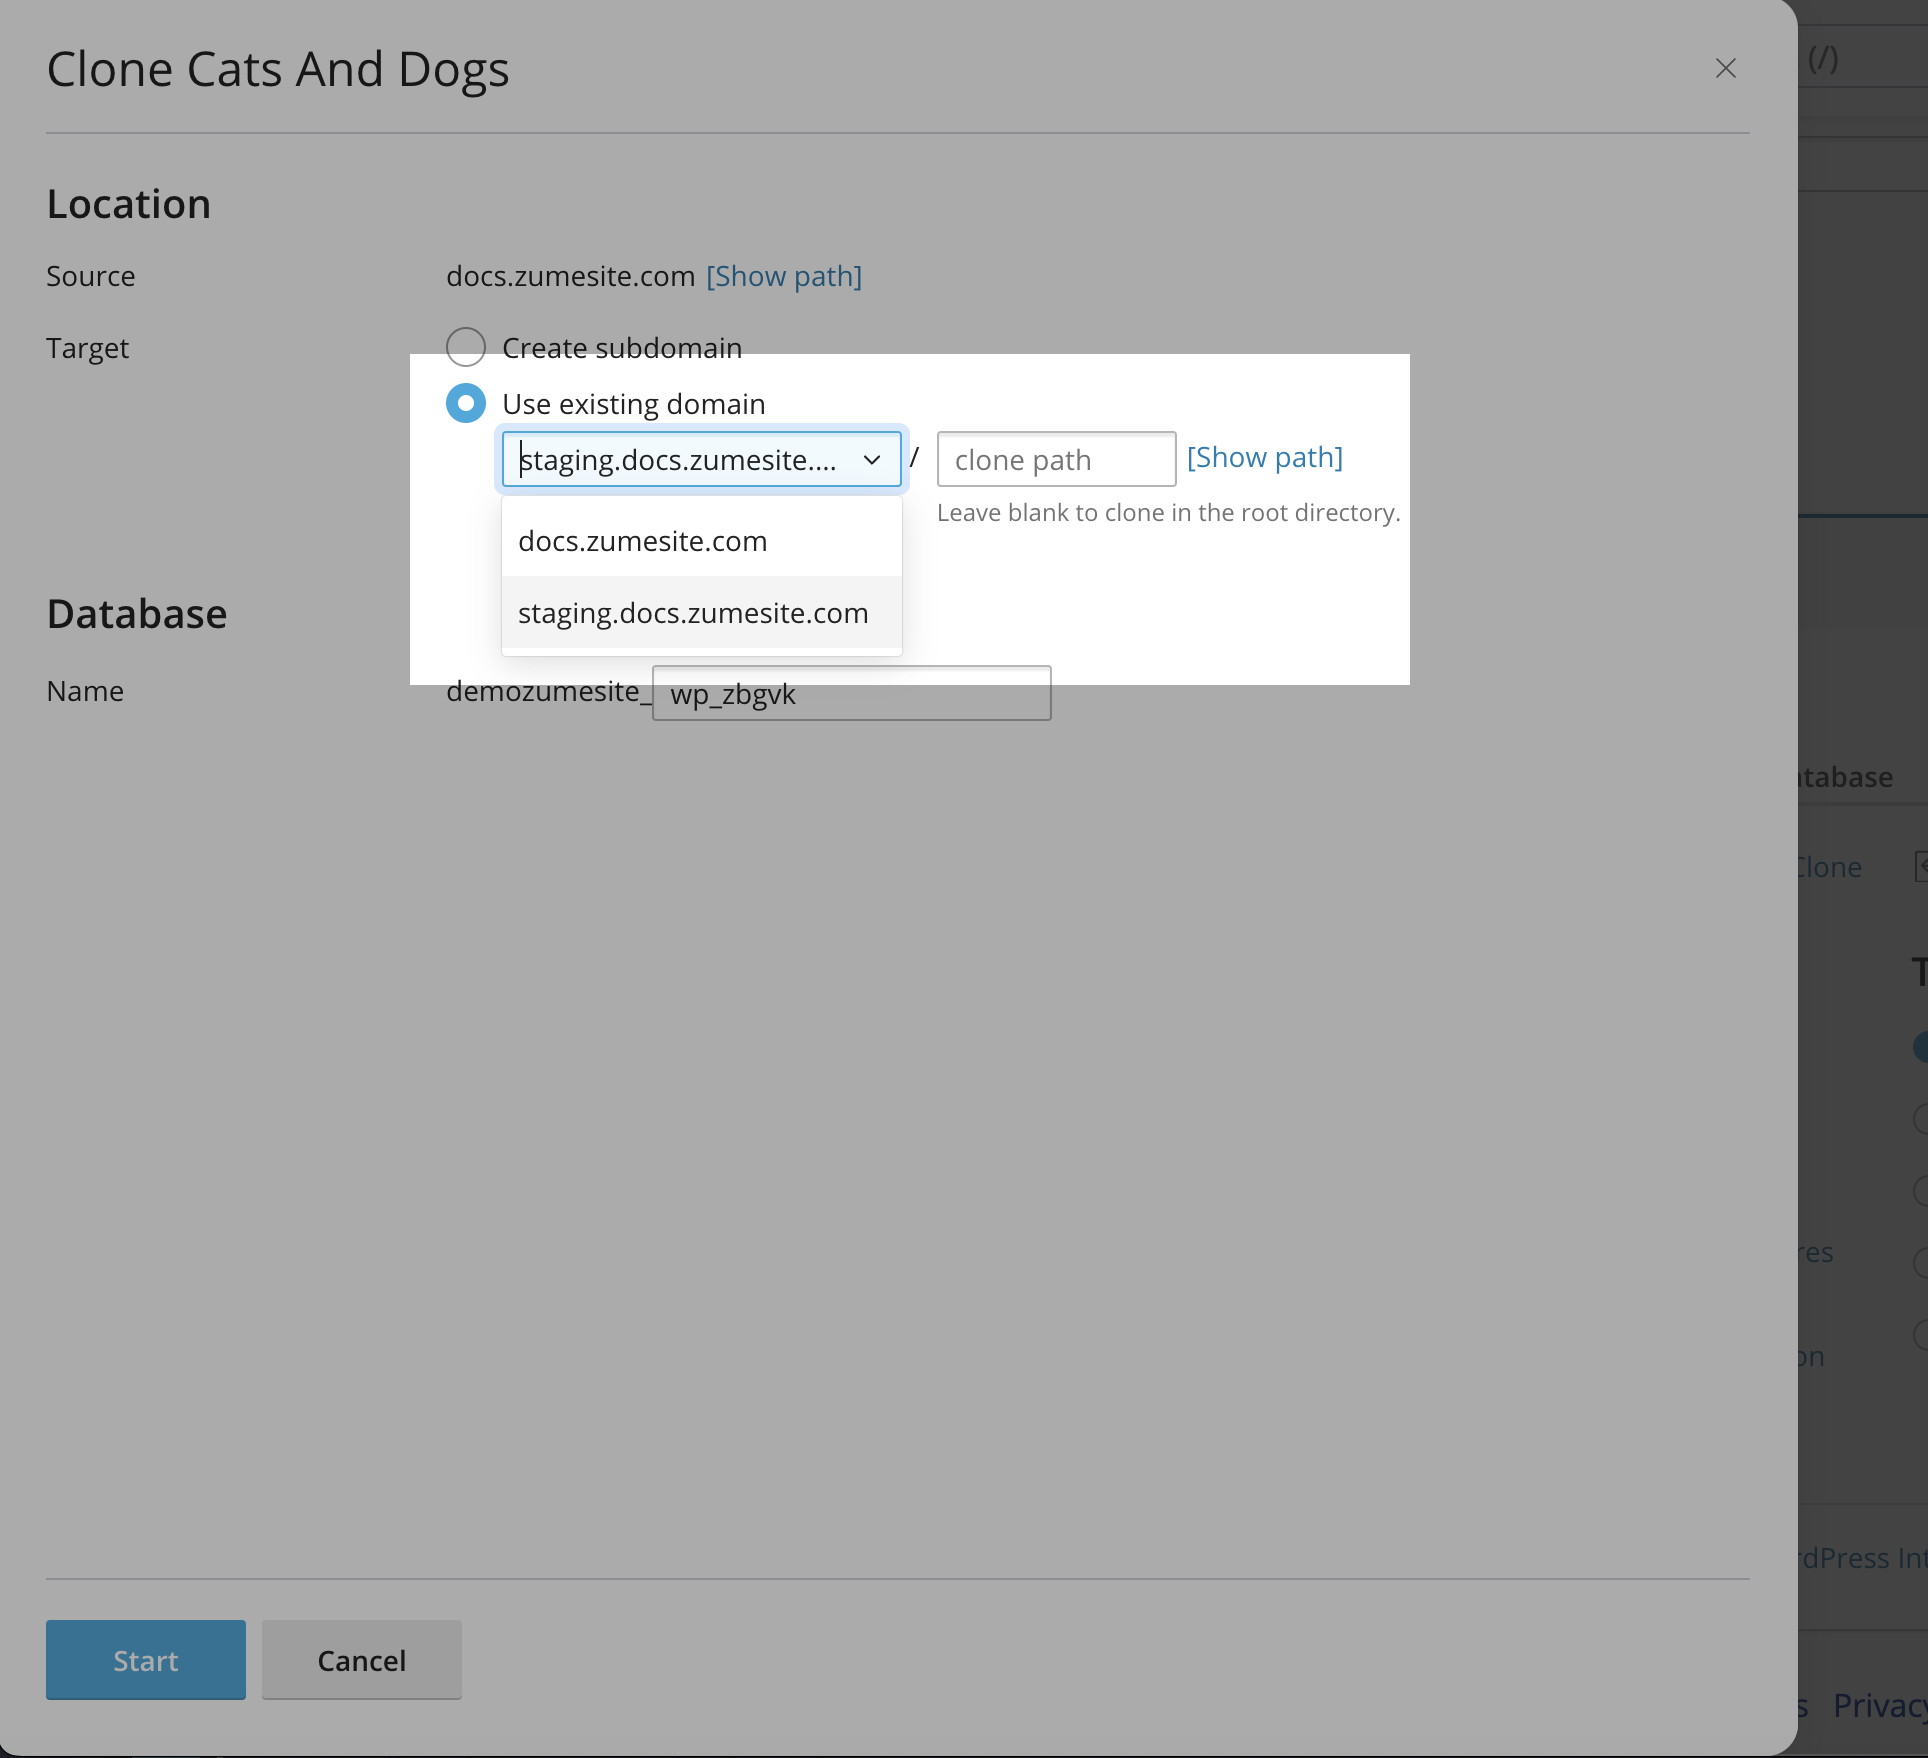
- Click “Start” to clone the live site.
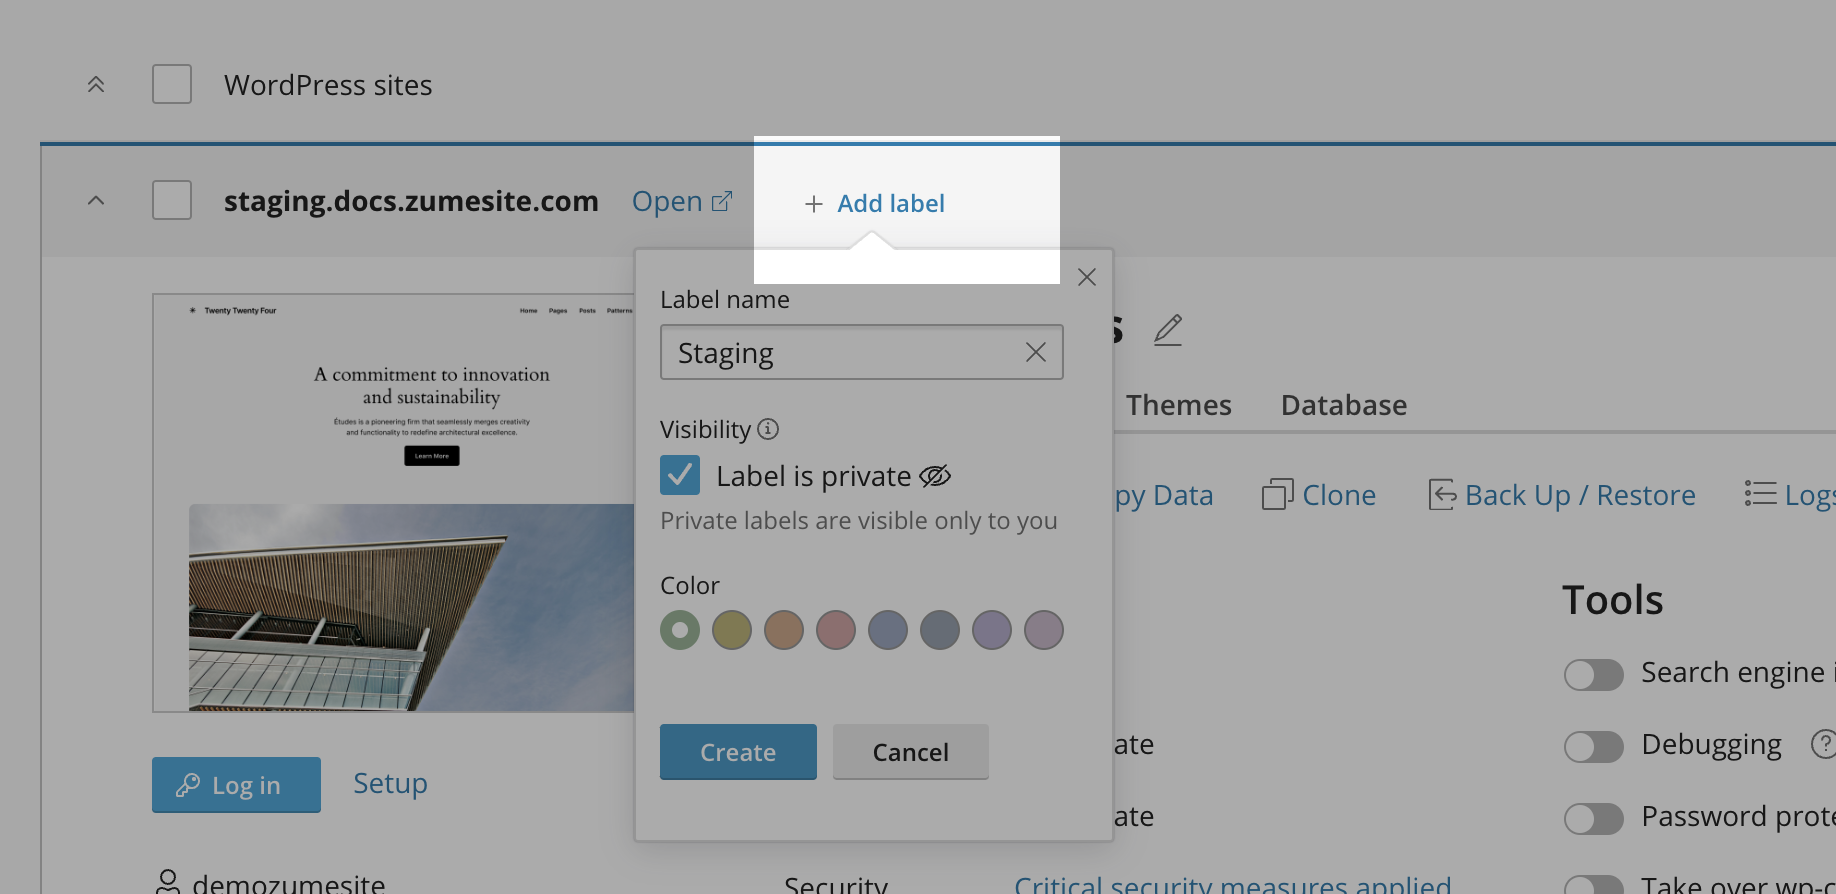
- You may want to add a label to the staging site to make it easier to identify.
Deploy the changes to the live site
- Navigate to the “WP Toolkit” option on the left-hand menu.
- Locate the staging site that you have been working on. Click the “Copy data” button.
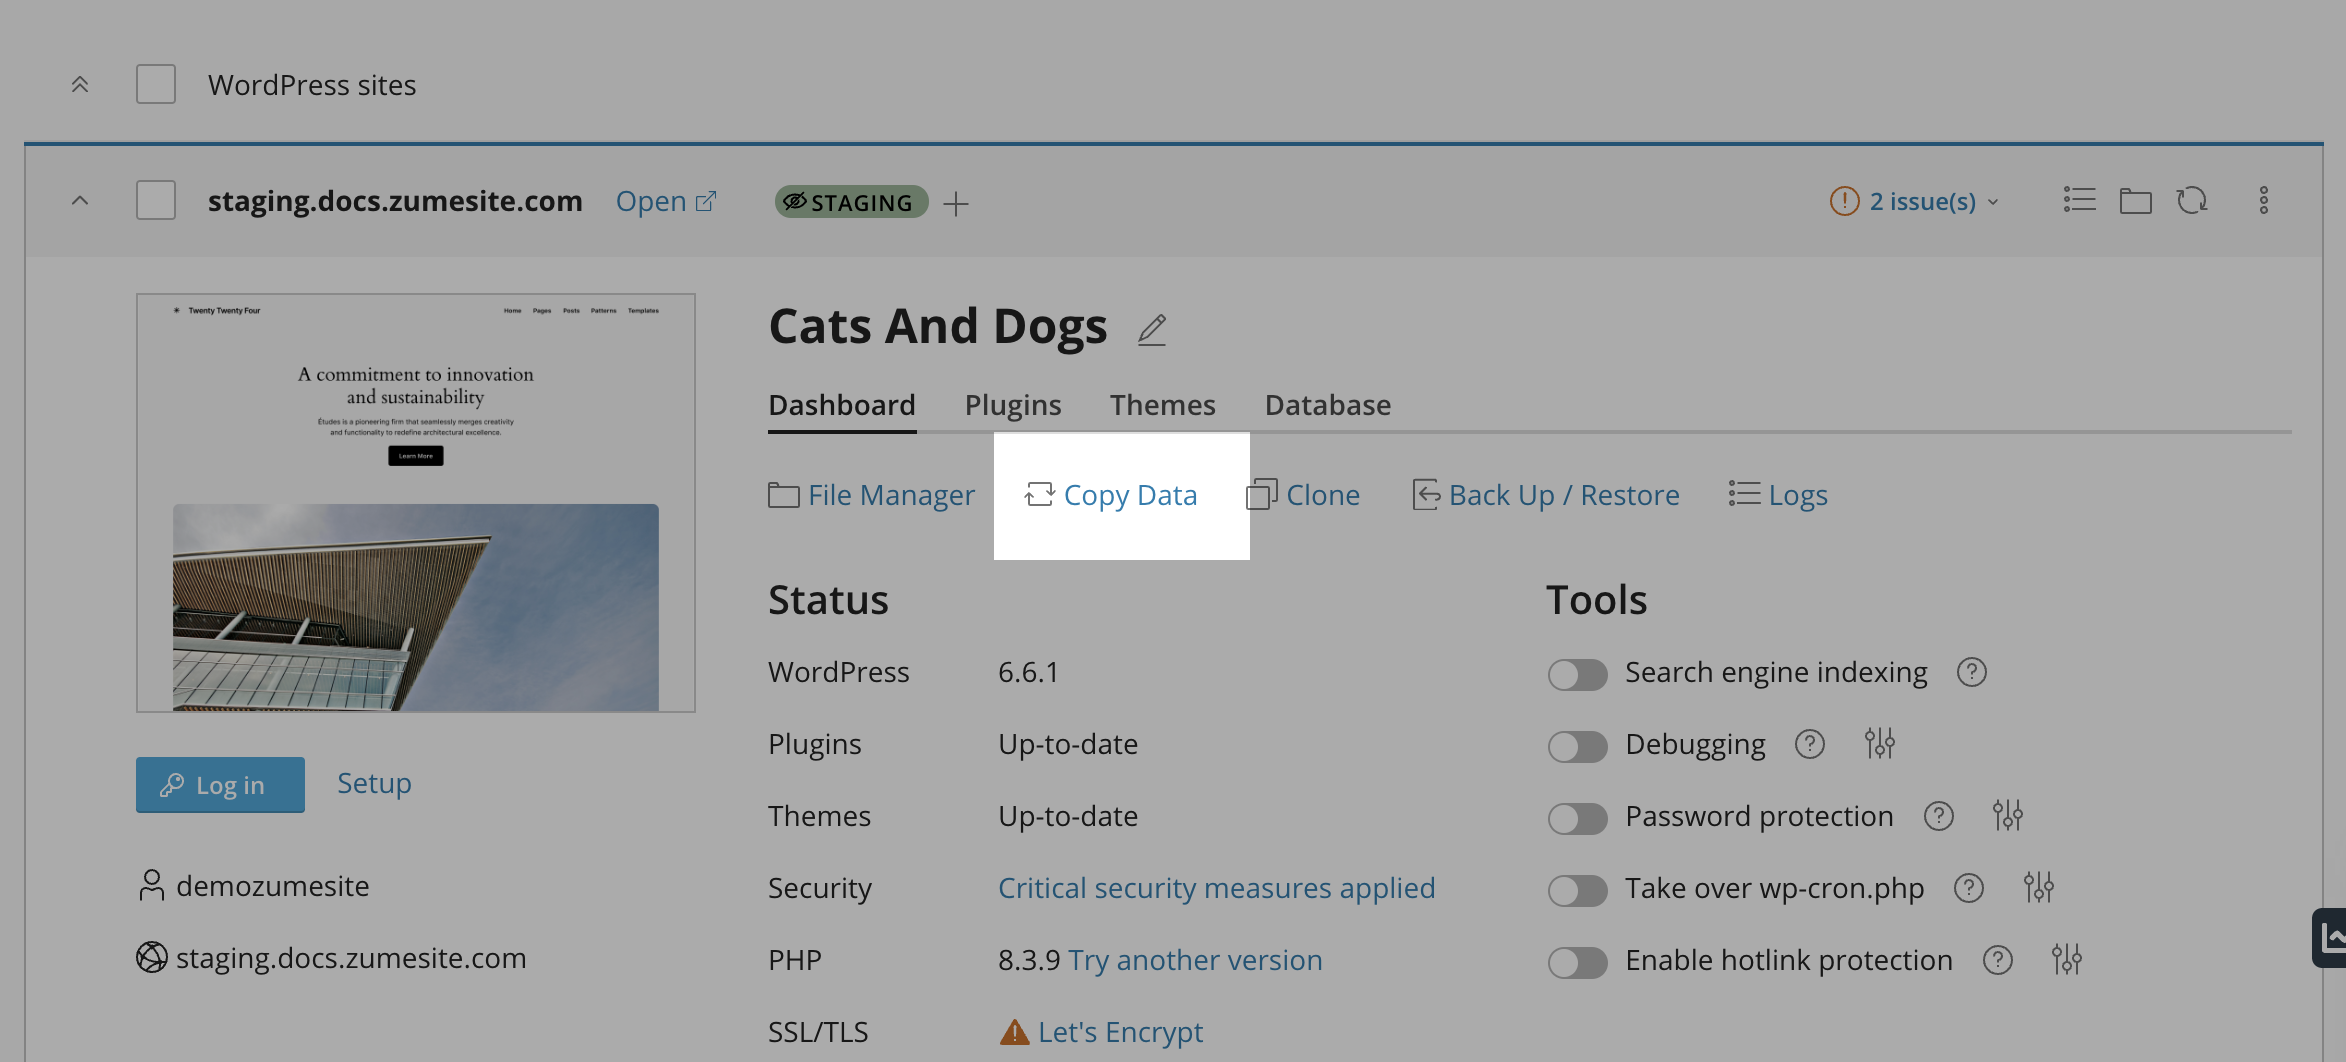
- Under the “Target” dropdown, select the live site that you want to deploy the changes to.
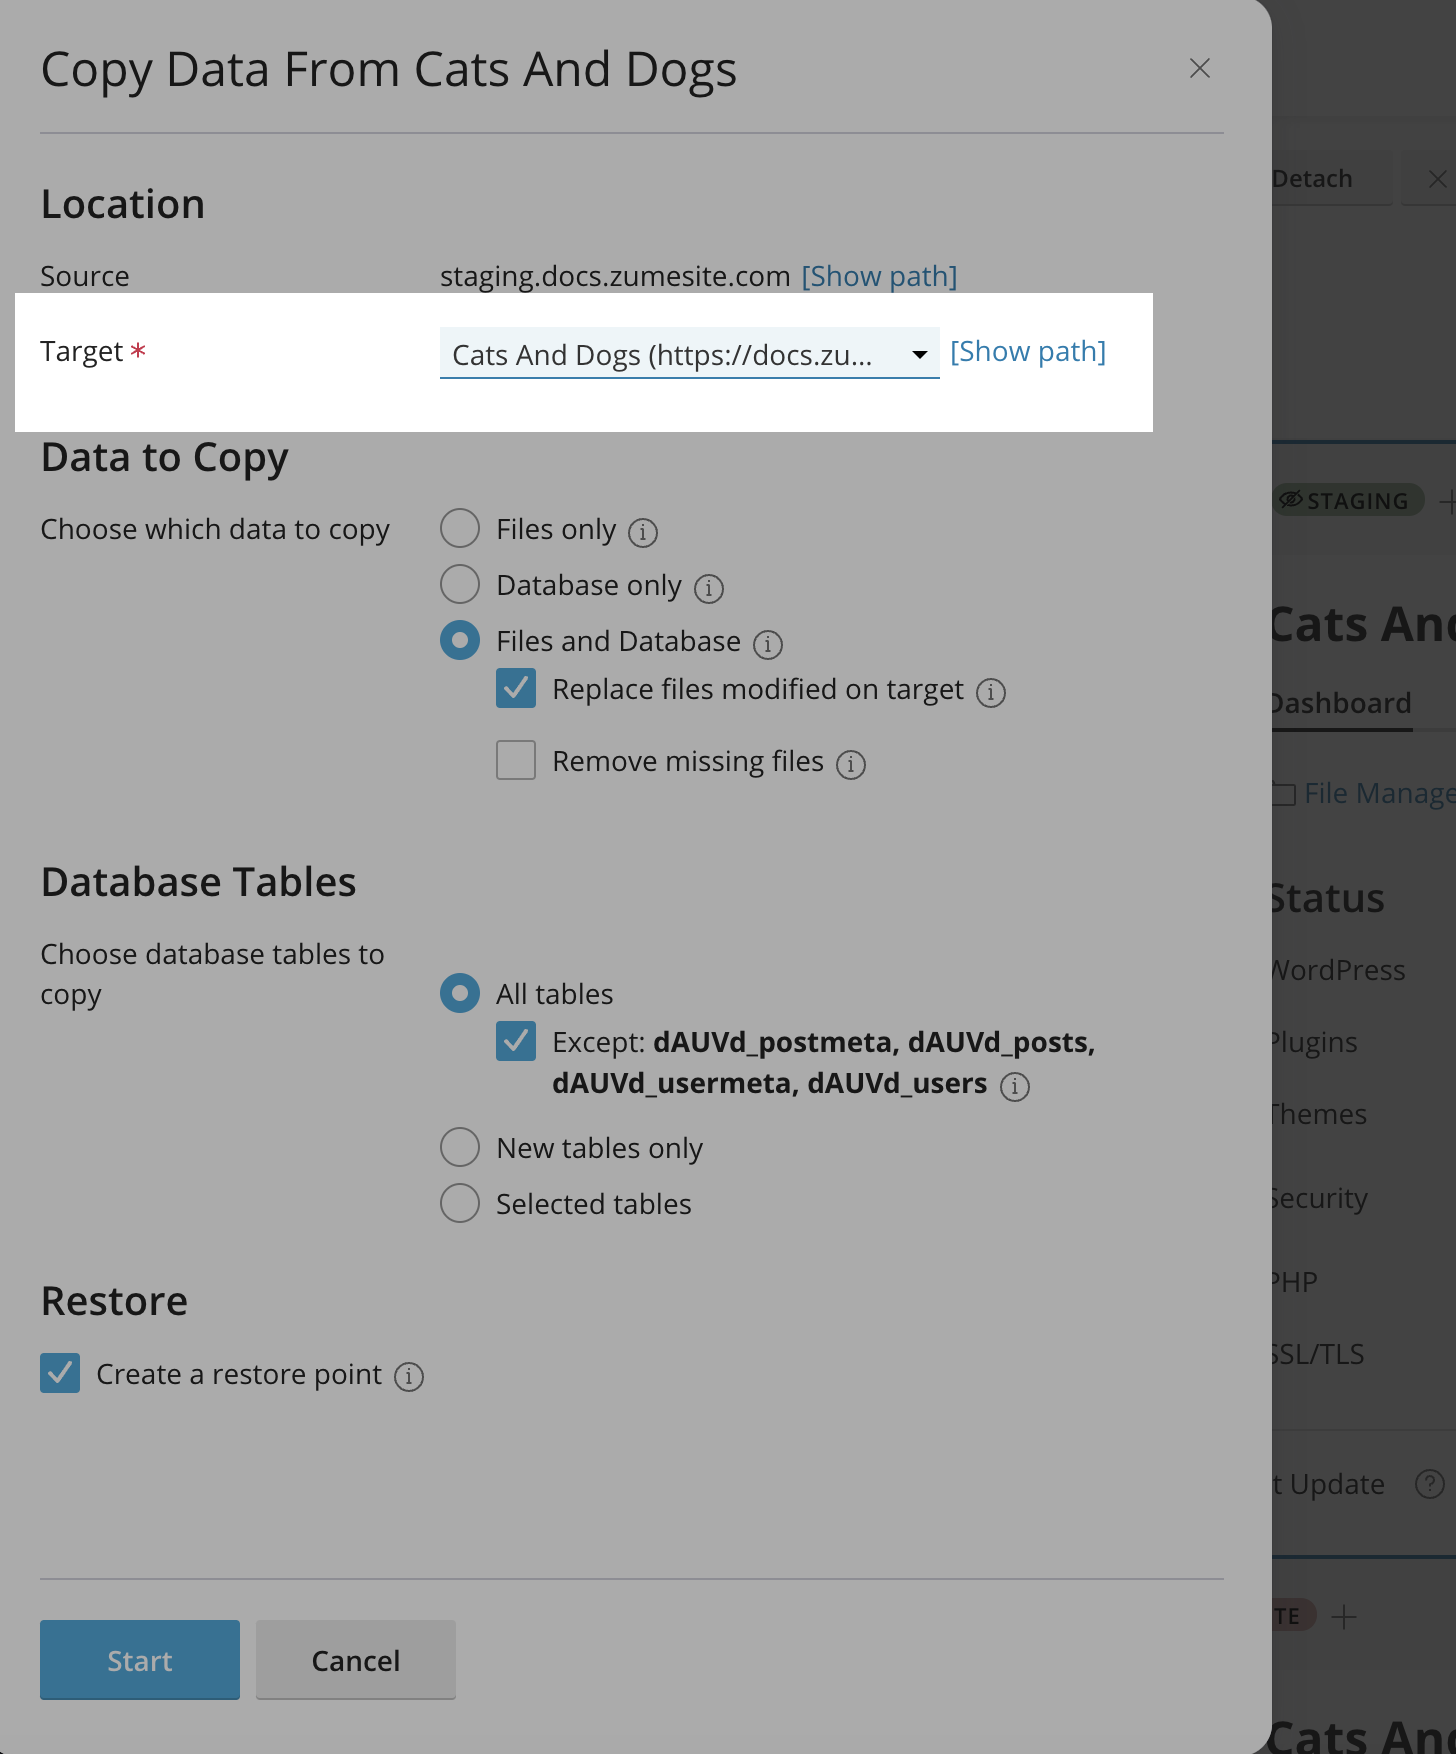
- Click “Start” to deploy the changes.
Make sure you have clicked ‘Copy data’ on the staging site, and selected the live site in the ‘Target’ dropdown!
- The changes have now been deployed to the live site.
-
How to install WordPress on Managed WordPress Hosting
It’s easy to get started with WordPress on Zume. This guide will walk you through the steps to install WordPress on your Managed WordPress Hosting with Zume.
We are more than happy to install WordPress for our Managed WordPress Hosting customers. Please contact our support team for help.
Log in to cPanel
Install WordPress
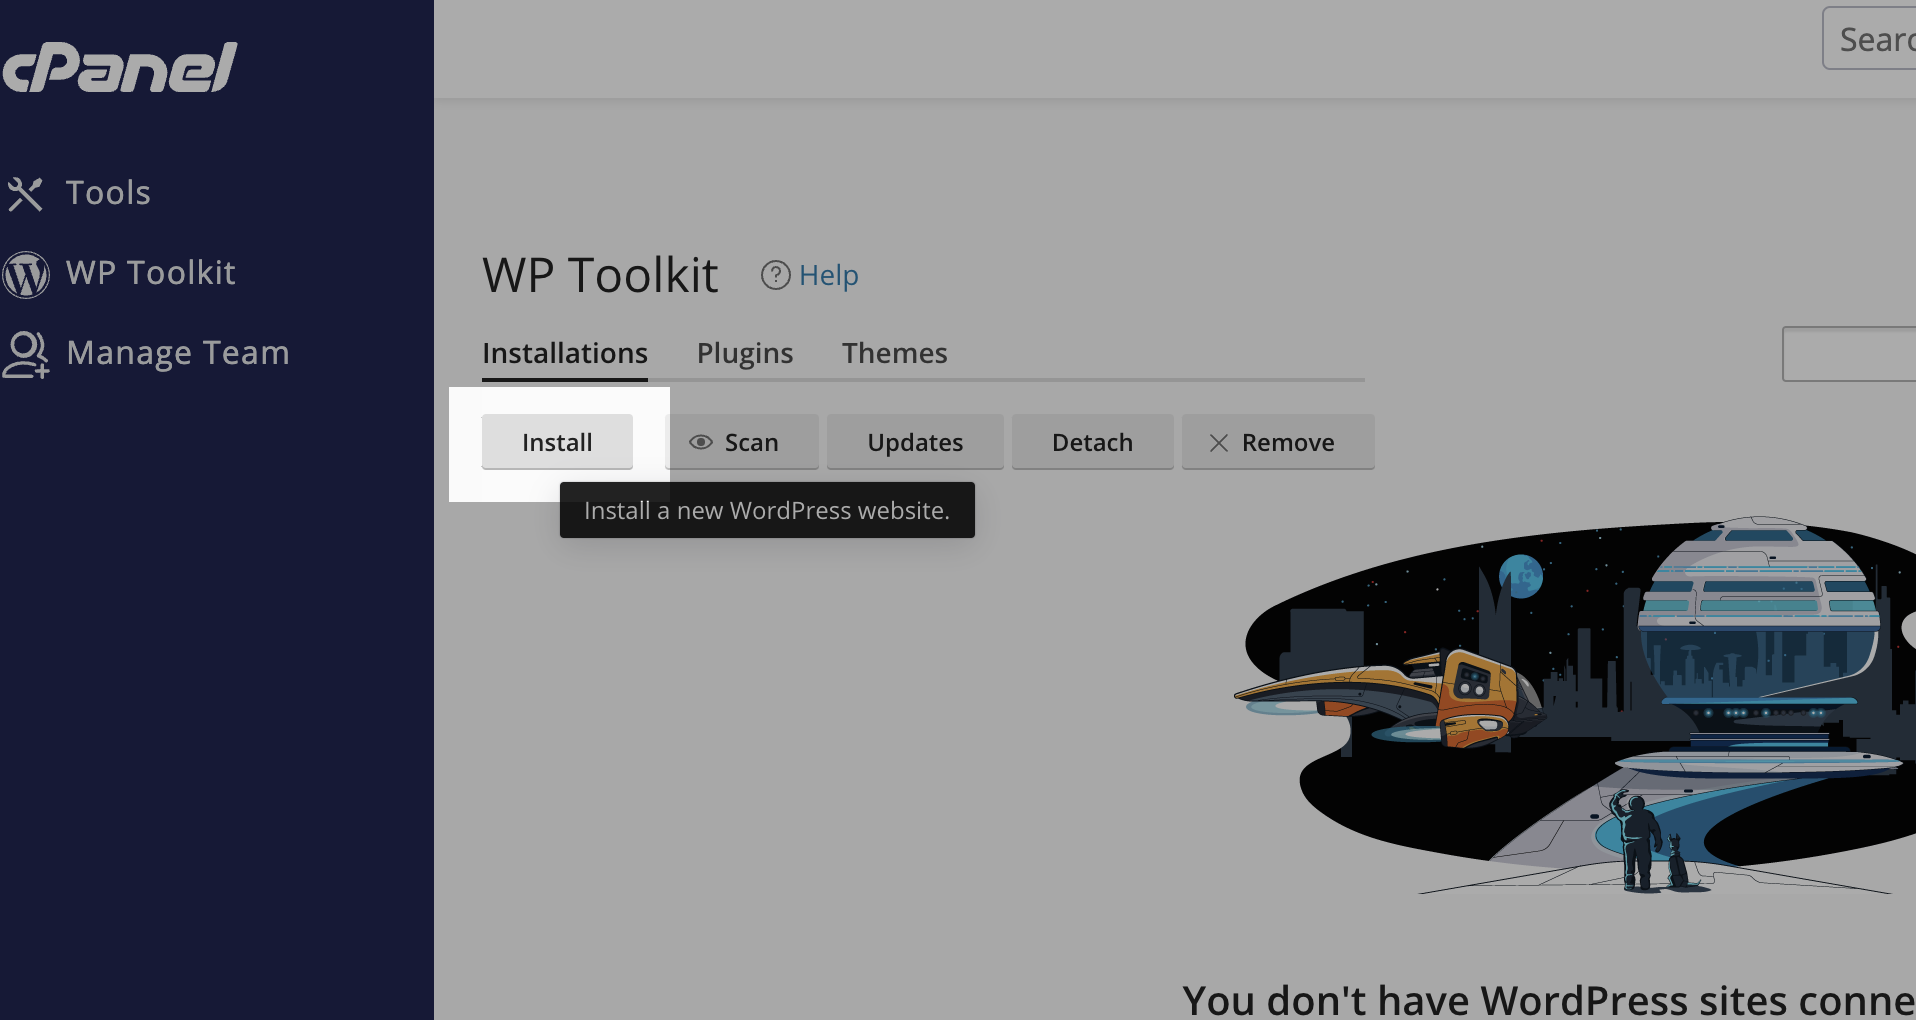
- Navigate to the “WP Toolkit” option on the left-hand menu.

- Click the “Install” button.
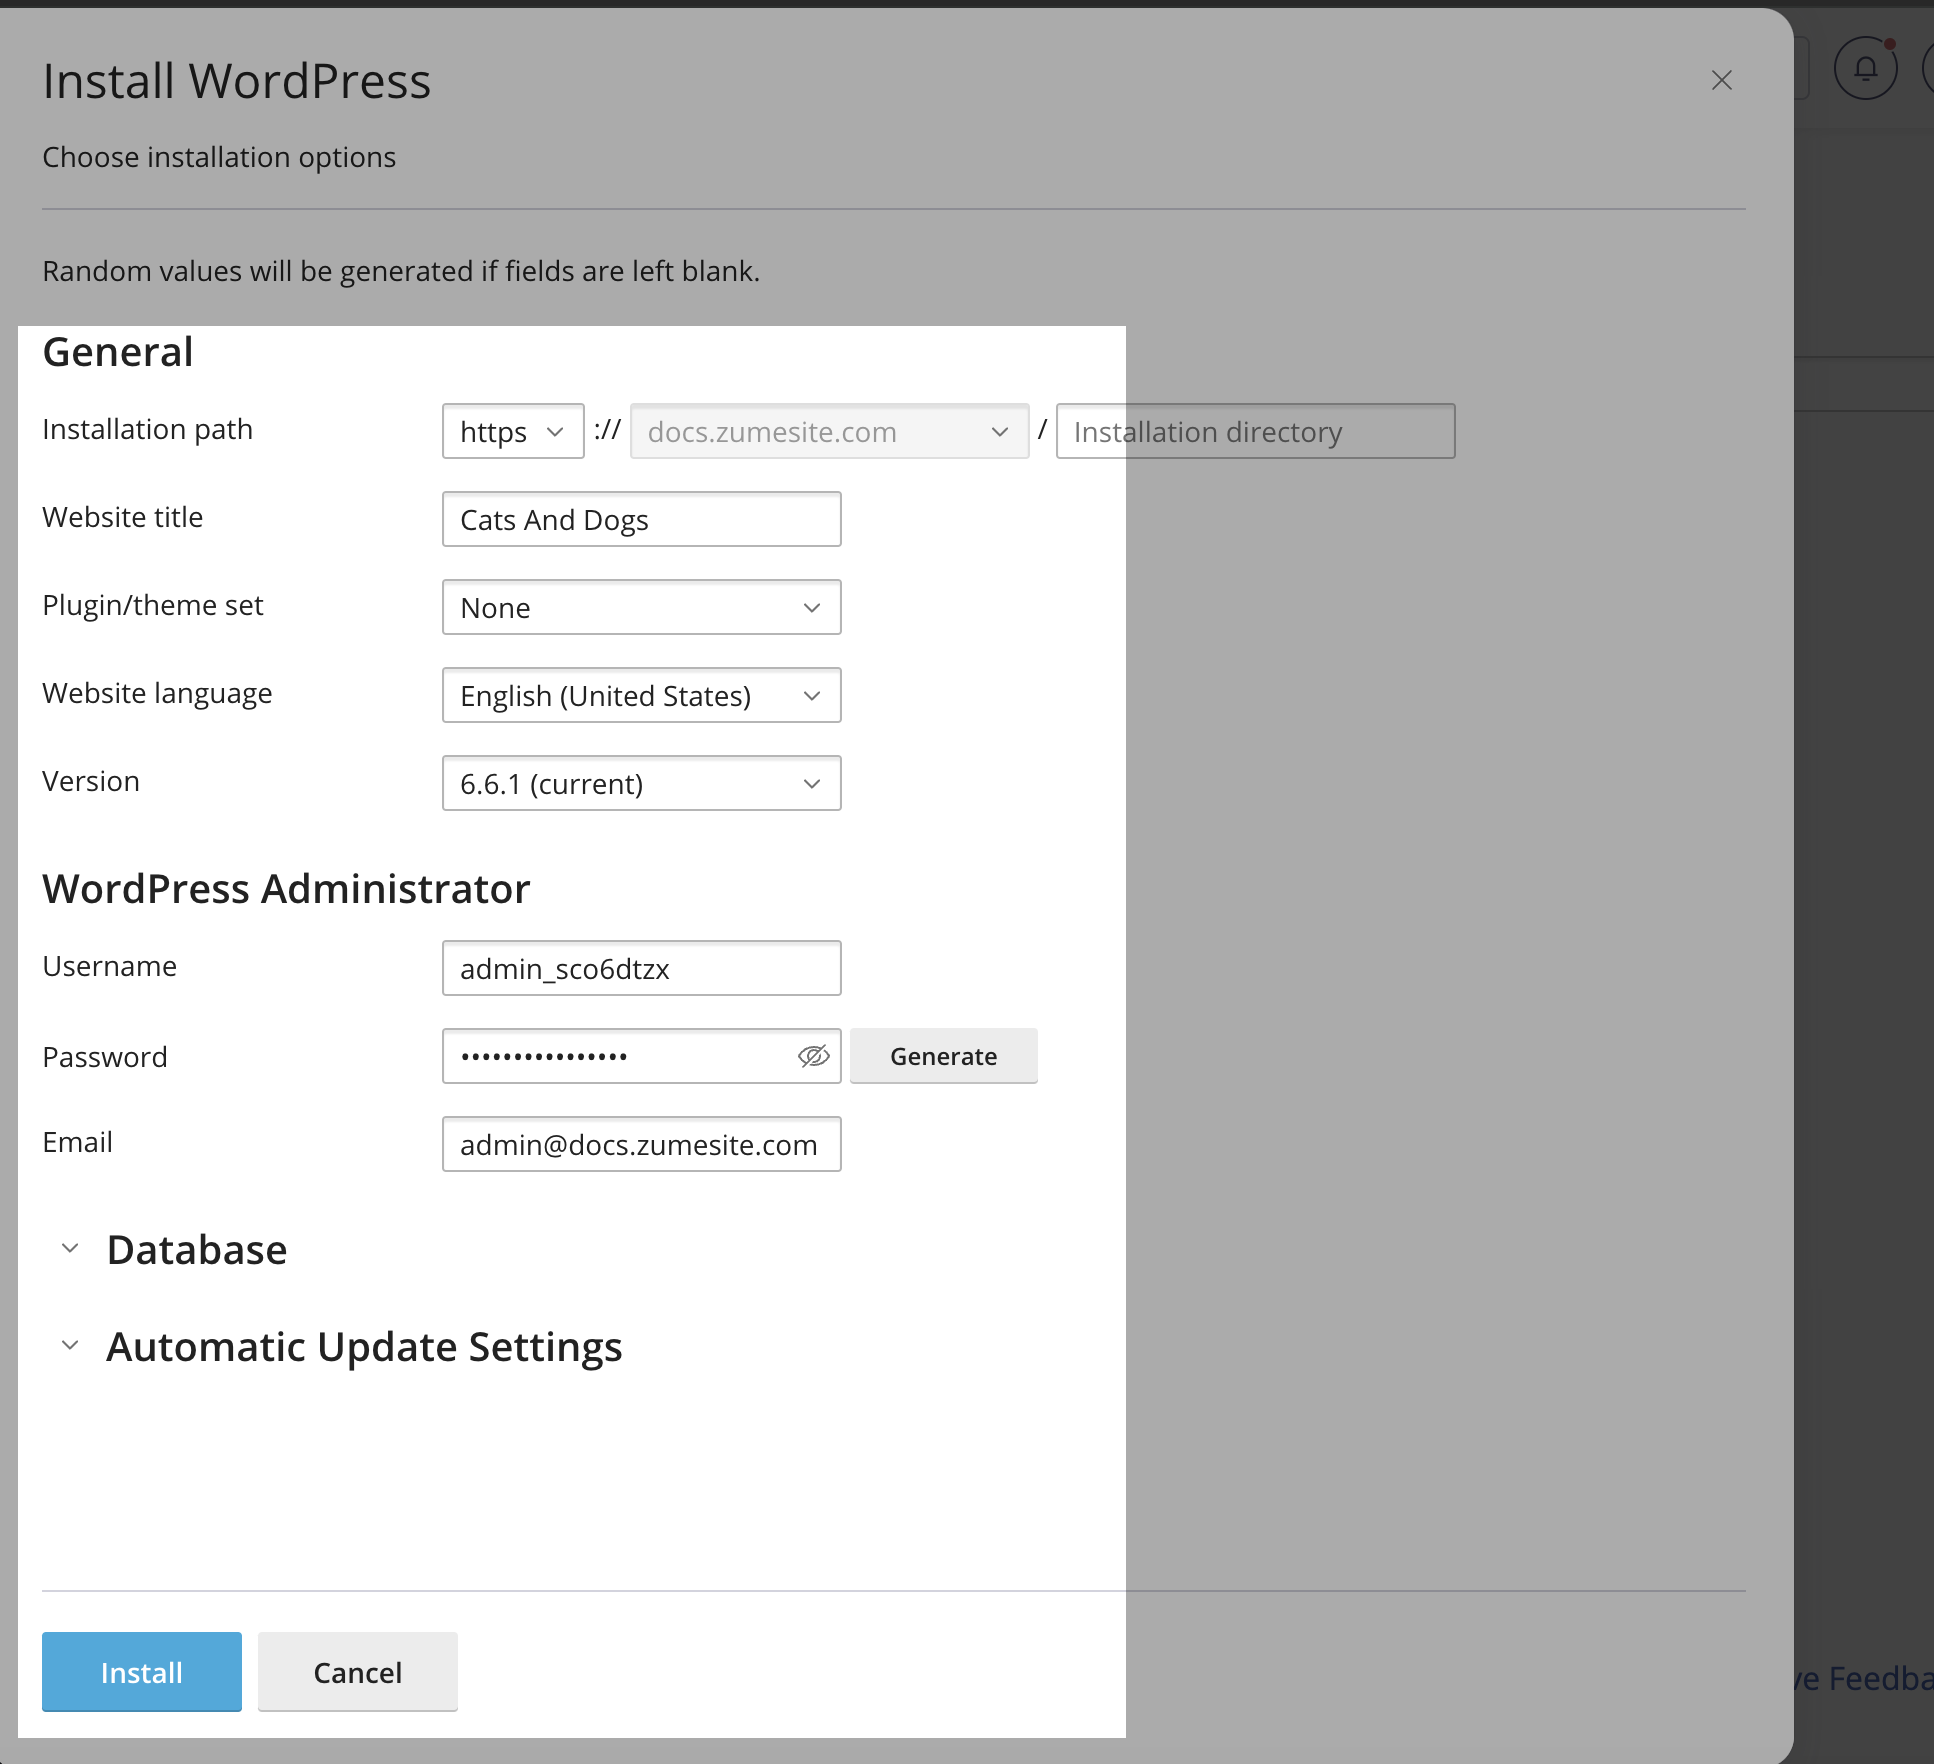
- Fill in the information, including the site title, admin username and password. Click the “Install” button.
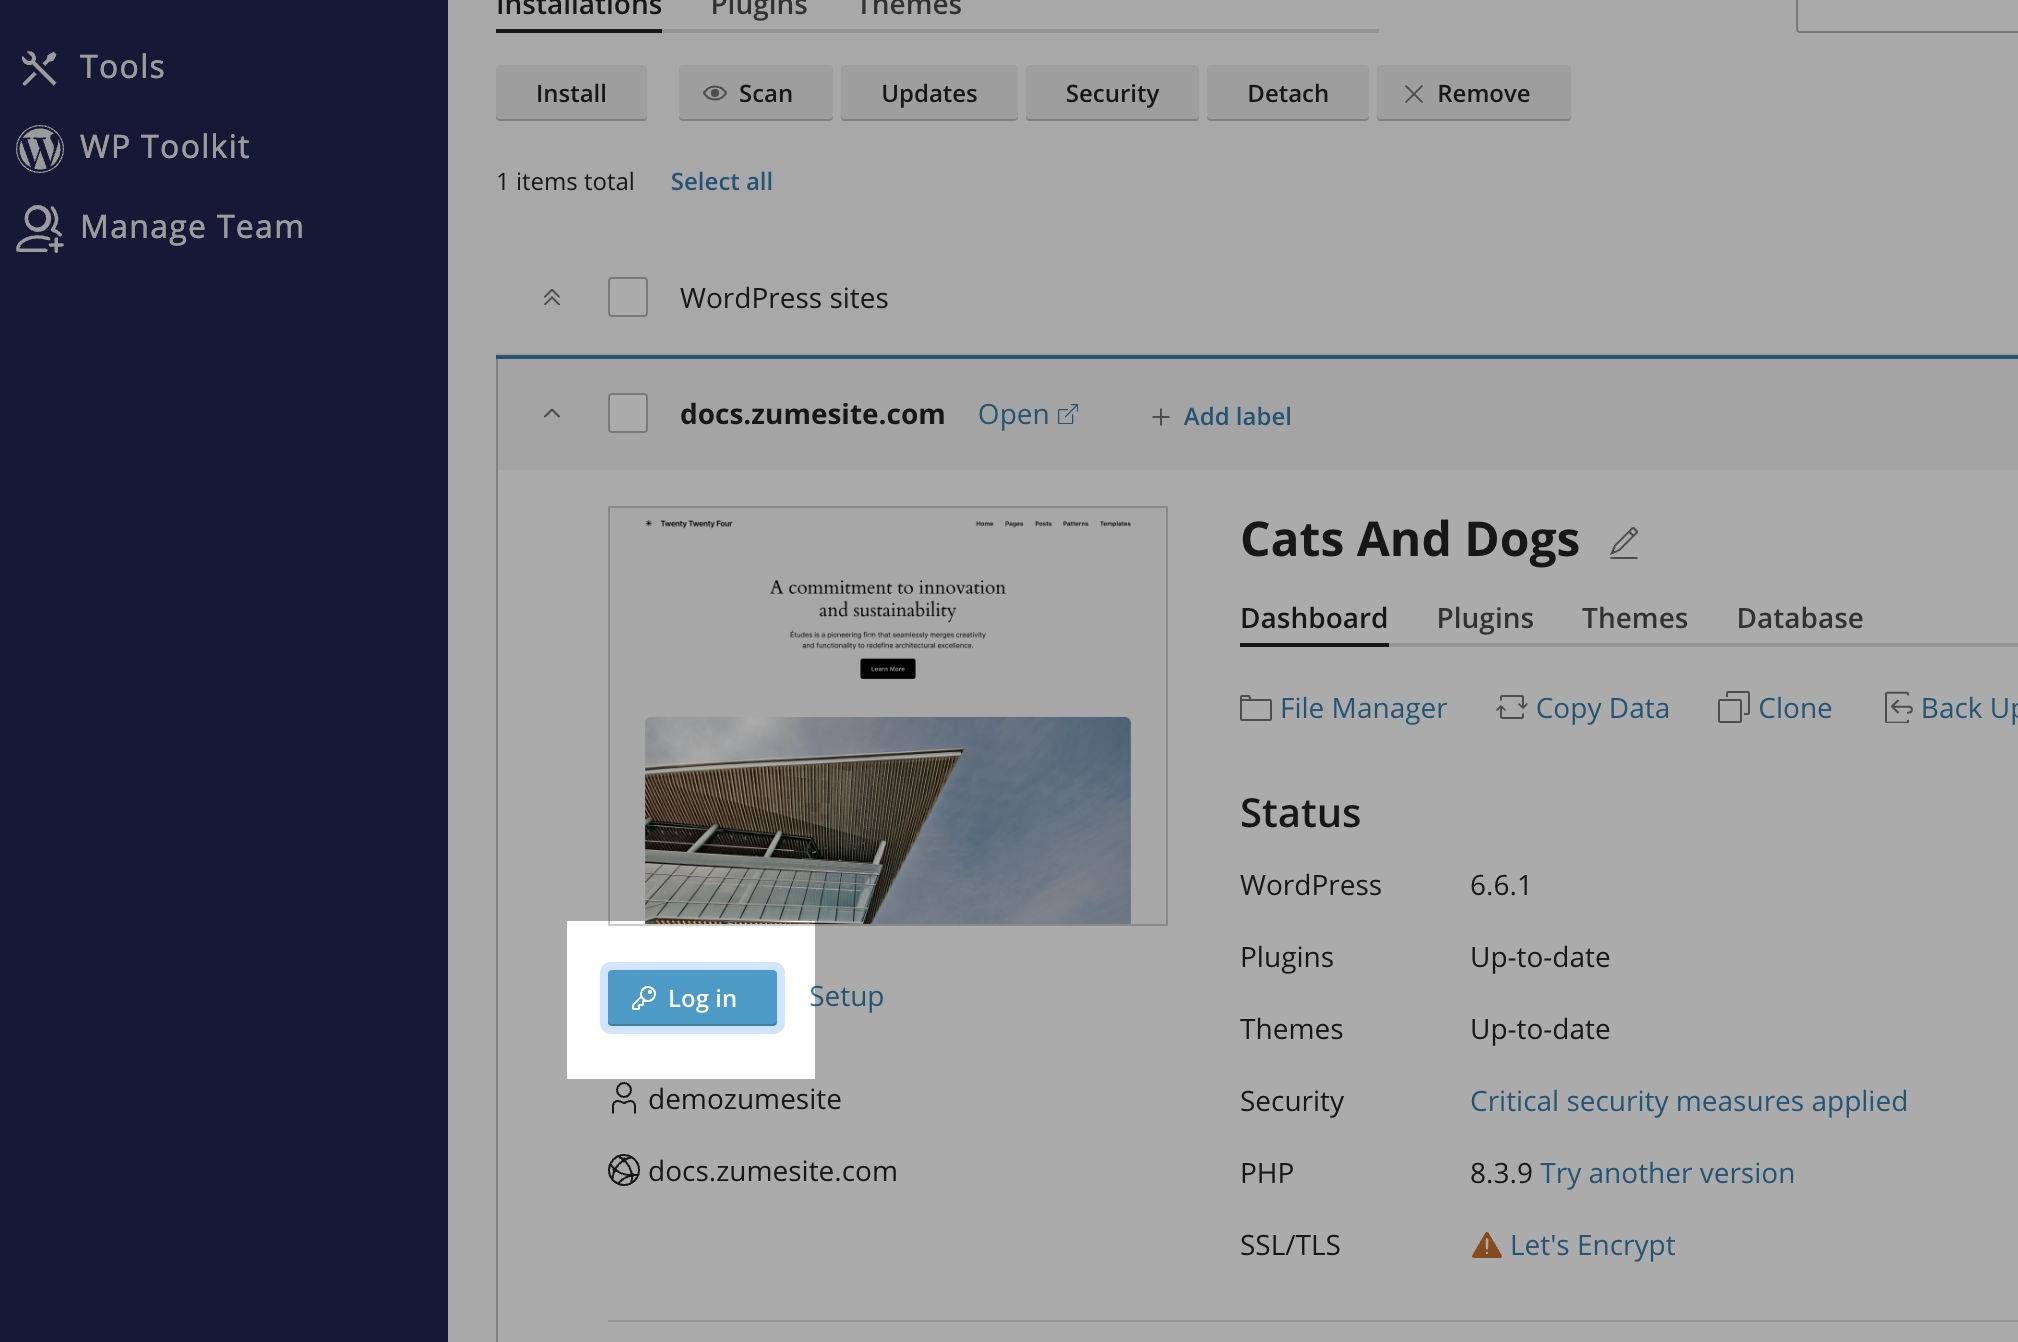
- Once the installation is complete, you can access your WordPress dashboard by clicking the “Log in” button.
-
How to Transfer a .uk Domain to Zume
Transfer your .uk domain to Zume, an Nominet-accredited registrar. Transferring a .uk domain is slightly different from transferring other domain extensions. The .uk domain uses a TAG system instead of auth codes. In this article, we’ll guide you through the steps to transfer your .uk domain to Zume for free.
The process for transferring domains without a .uk ending is different
If you want to transfer a non-.uk domain to Zume, please follow our guide on how to transfer a domain to Zume.
Zume’s Nominet TAG
Zume is a Nominet-accredited registrar. This means that we’re an official registrar for .uk domains.
Our Nominet TAG is ZUMEIO.
ZUMEIOTo transfer your .uk domain to Zume, you’ll need to update the TAG to ZUMEIO. There is no concept of domain transfer-locking or EPP codes for .uk domains.
Retagging a .uk should be free
Registrars are obliged to retag domains promptly, though they might charge for this. Despite costing them nothing, if your registrar plans to charge, we suggest going directly to the .uk registry, Nominet Online Services, and paying them £10 + VAT.
This has two perks:
- Immediate action
- It may discourage charging for leaving, which we deem unethical. If not, at least your current registrar won’t profit from your exit.
Enough with the formalities, let’s get started with the transfer process!
- Inform us about the transferYou should place a free transfer order with us before you change the TAG. This will ensure we know who to assign the domain to once it arrives, so it doesn’t get detagged and lost in the system!
- Log into the Zume client area.
- Go to the Transfer Domains to Us page.
- Enter your domain name in the provided field and click the Check Availability button. If your domain is available for transfer, you’ll see a message stating that it’s available.
- Leave the EPP code field empty and click the Add to Cart button to add the domain to your cart.
- Click the Continue button to proceed to the checkout page.
- Complete the checkout process to initiate the transfer.
- Request the TAG change with your current registrarNow contact your current registrar and ask them to update the IPS TAG to ZUMEIO on the domain you are transferring.
- Wait for the Transfer to Complete.uk domain transfers are usually completed within 1 hour of the TAG change. You can check the status of your transfer from your Zume client area.
- Log into the Zume client area.
- Go to the Domains page.
- View the status of your transfer.
- Update Your NameserversOnce the transfer is complete, you’ll need to update your domain’s nameservers to point to your hosting provider. You can do this from your Zume client area.View our guide on how to update your domain’s nameservers to Zume’s so your domain automatically works with your hosting plan.
- Log into the Zume client area.
- Go to the Domains page.
- Click the Manage Domain button next to the domain you want to update.
- Click the Nameservers tab.
- Enter your nameservers in the provided fields.
- Click the Change Nameservers button to save your changes.
-
How to Transfer a Domain to Zume
Transferring your domain to Zume is a straightforward process. In this article, we’ll guide you through the steps to transfer your domain to Zume from another registrar.
The process for transferring a .uk domain is different
If you want to transfer a .uk domain to Zume, please follow our guide on how to transfer a .uk domain to Zume.
Domains registered within the last 60 days cannot be transferred
Please note that domains registered within the last 60 days cannot be transferred due to ICANN regulations. If your domain was registered within the last 60 days, you’ll need to wait until the 60-day period has passed before you can transfer it to Zume.
- Prepare Your Domain for TransferBefore you can transfer your domain to Zume, you’ll need to prepare it for transfer at your current registrar. Follow these steps to prepare your domain:Unlock Your DomainUnlock your domain. If your domain is locked, you’ll need to unlock it before you can transfer it. You can usually do this from your domain registrar’s control panel.
- Unlock your domain at GoDaddy
- Unlock your domain at Namecheap
- Unlock your domain at 123-reg
- Unlock your domain at Google Domains
- Unlock your domain at Name.com
- Unlock your domain at HostGator
- Unlock your domain at Bluehost
- Unlock your domain at DreamHost
- Unlock your domain at Hostinger
- Unlock your domain at Fasthosts
- Unlock your domain at 1&1
- Obtain your EPP code at GoDaddy
- Obtain your EPP code at Namecheap
- Obtain your EPP code at 123-reg
- Obtain your EPP code at Google Domains
- Obtain your EPP code at Name.com
- Obtain your EPP code at HostGator
- Obtain your EPP code at Bluehost
- Obtain your EPP code at DreamHost
- Obtain your EPP code at Hostinger
- Obtain your EPP code at Fasthosts
- Obtain your EPP code at 1&1
- Initiate the TransferOnce you’ve prepared your domain for transfer, you can initiate the transfer from your Zume client area. Follow these steps to initiate the transfer:
- Log into the Zume client area.
- Go to the Transfer Domains to Us page.
- Enter your domain name in the provided field and click the Check Availability button. If your domain is available for transfer, you’ll see a message stating that it’s available.
- Click the Add to Cart button to add the domain to your cart.
- Click the Continue button to proceed to the checkout page.
- Complete the checkout process to initiate the transfer.
- Wait for the Transfer to CompleteOnce you’ve approved the transfer, you’ll need to wait for it to complete. The transfer process can take up to 7 days to complete, depending on your domain registrar. You can check the status of your transfer from your Zume client area.
- Log into the Zume client area.
- Go to the Domains page.
- View the status of your transfer.
- Update Your NameserversOnce the transfer is complete, you’ll need to update your domain’s nameservers to point to your hosting provider. You can do this from your Zume client area.
- Log into the Zume client area.
- Go to the Domains page.
- Click the Manage Domain button next to the domain you want to update.
- Click the Nameservers tab.
- Enter your nameservers in the provided fields.
- Click the Change Nameservers button to save your changes.
- Prepare Your Domain for TransferBefore you can transfer your domain to Zume, you’ll need to prepare it for transfer at your current registrar. Follow these steps to prepare your domain:Unlock Your DomainUnlock your domain. If your domain is locked, you’ll need to unlock it before you can transfer it. You can usually do this from your domain registrar’s control panel.
-
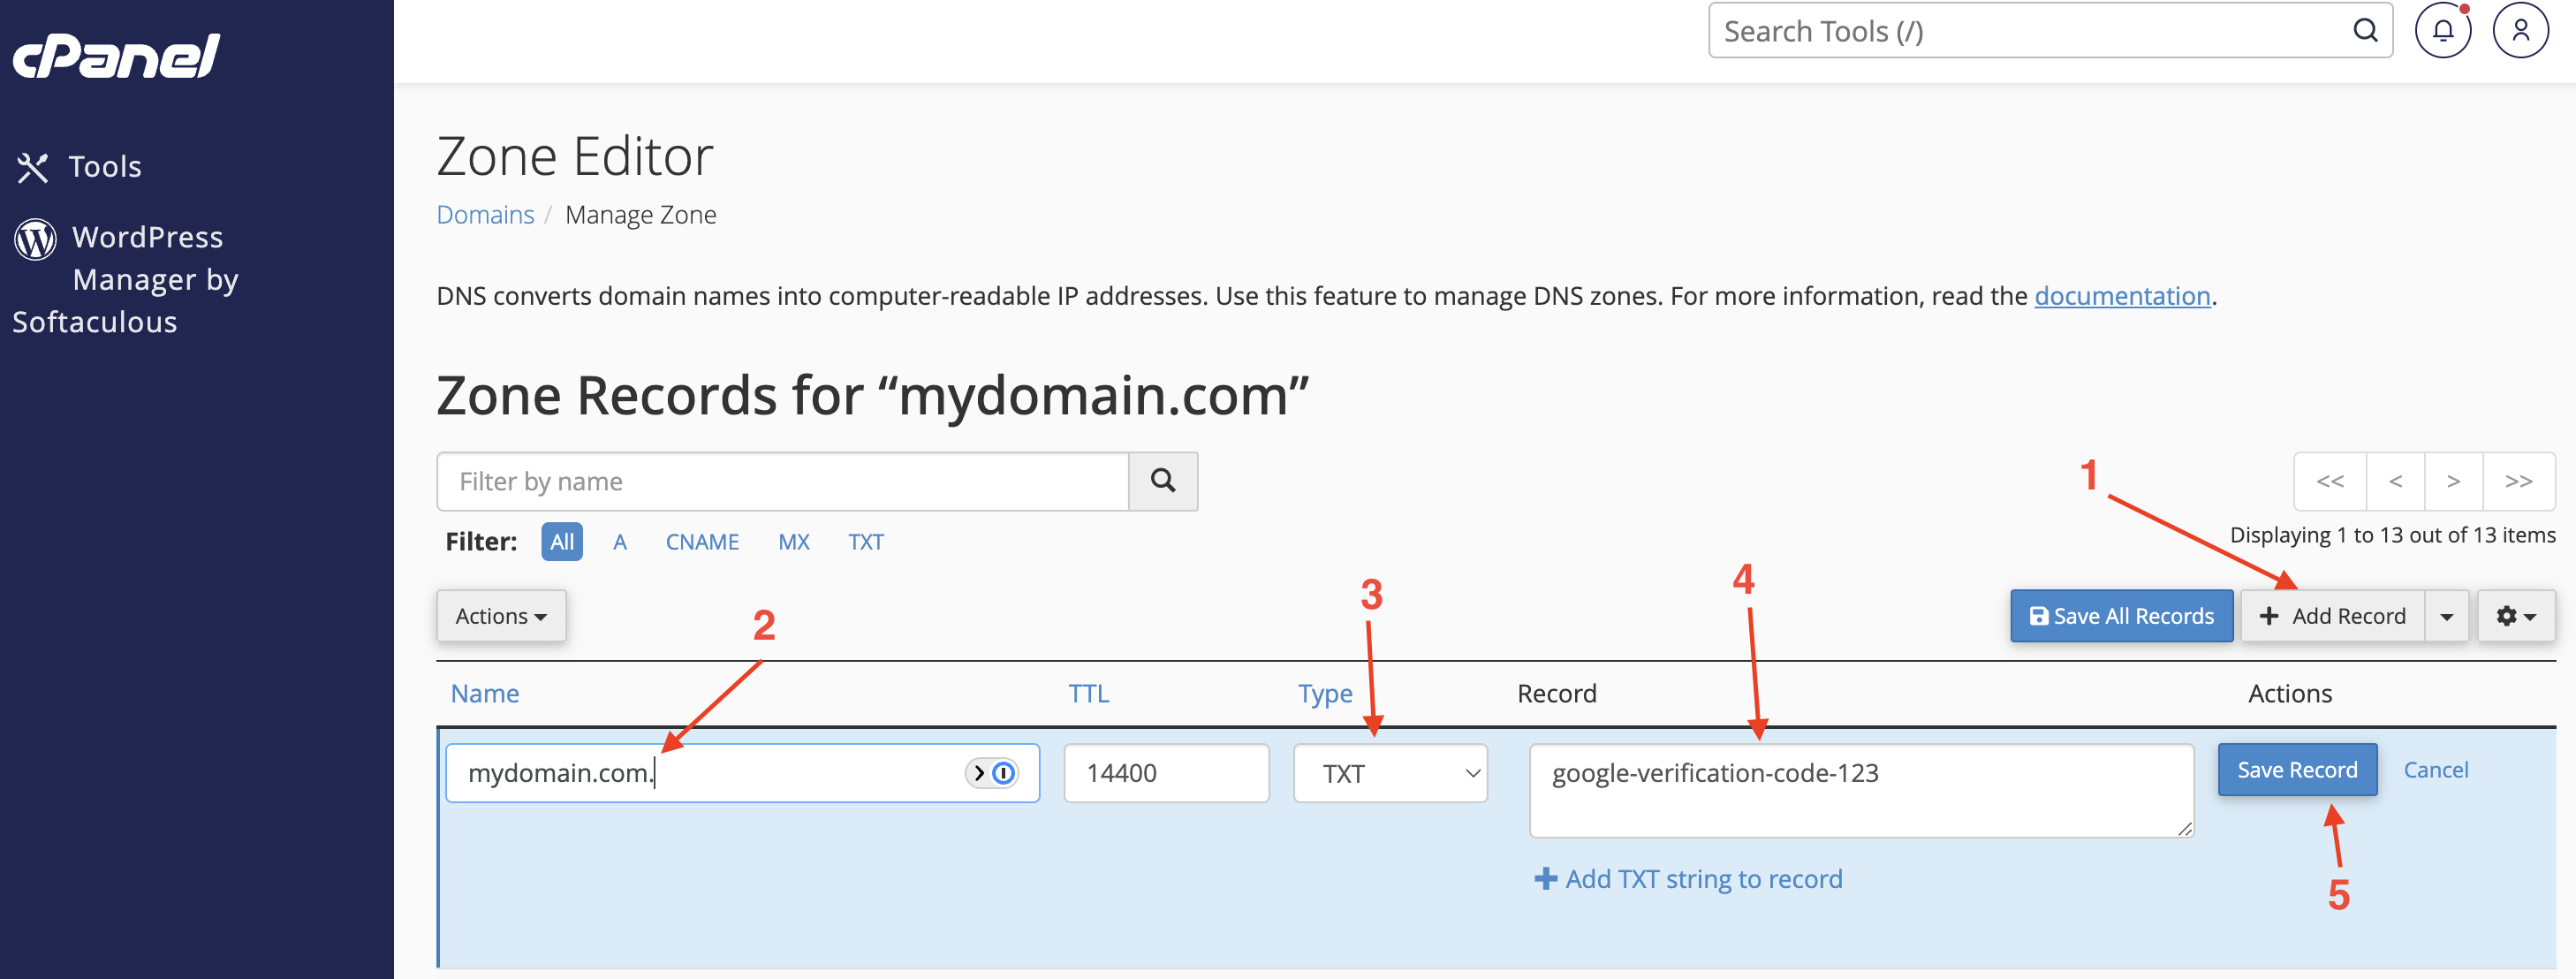
How to add a DNS Record in cPanel with the Zone Editor
Somtimes you may need to add a DNS record to your domain in cPanel, for example to set up Google Workspace or verify your domain with a third-party service. In this guide, we will walk you through the steps to add a DNS record in cPanel.
- Log in to cPanelLog in to your cPanel account using your credentials.
- Go to the DNS Zone EditorIn the cPanel dashboard, navigate to the “Domains” section and click on “Zone Editor.”
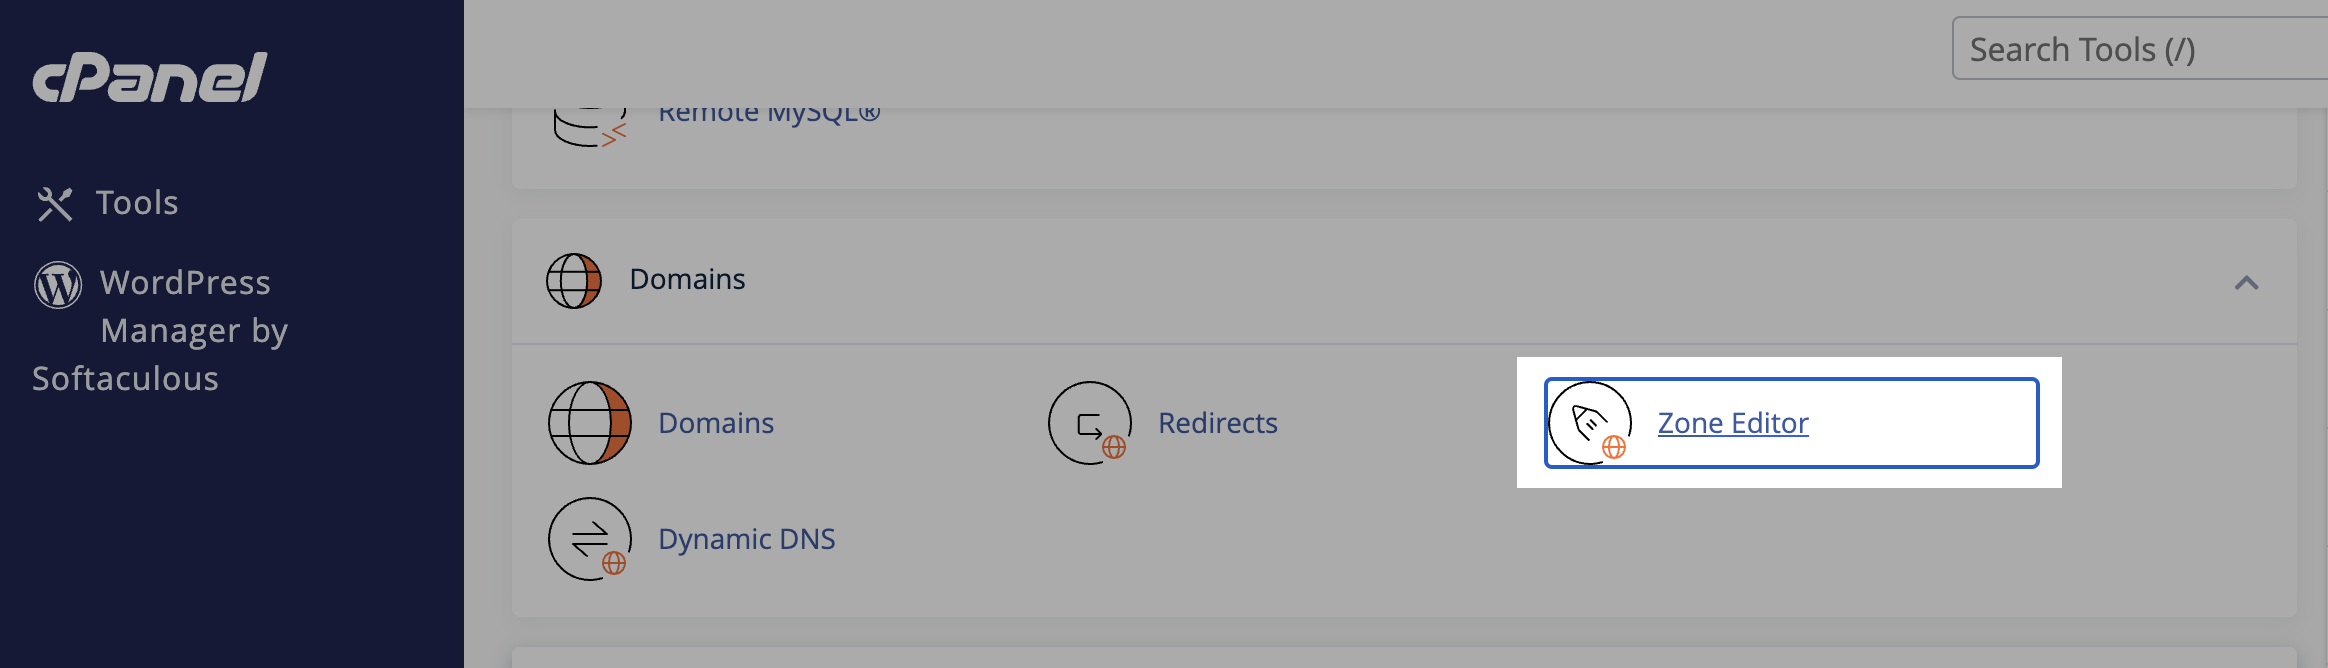 Find your domain in the list of domains and click on “Manage.”
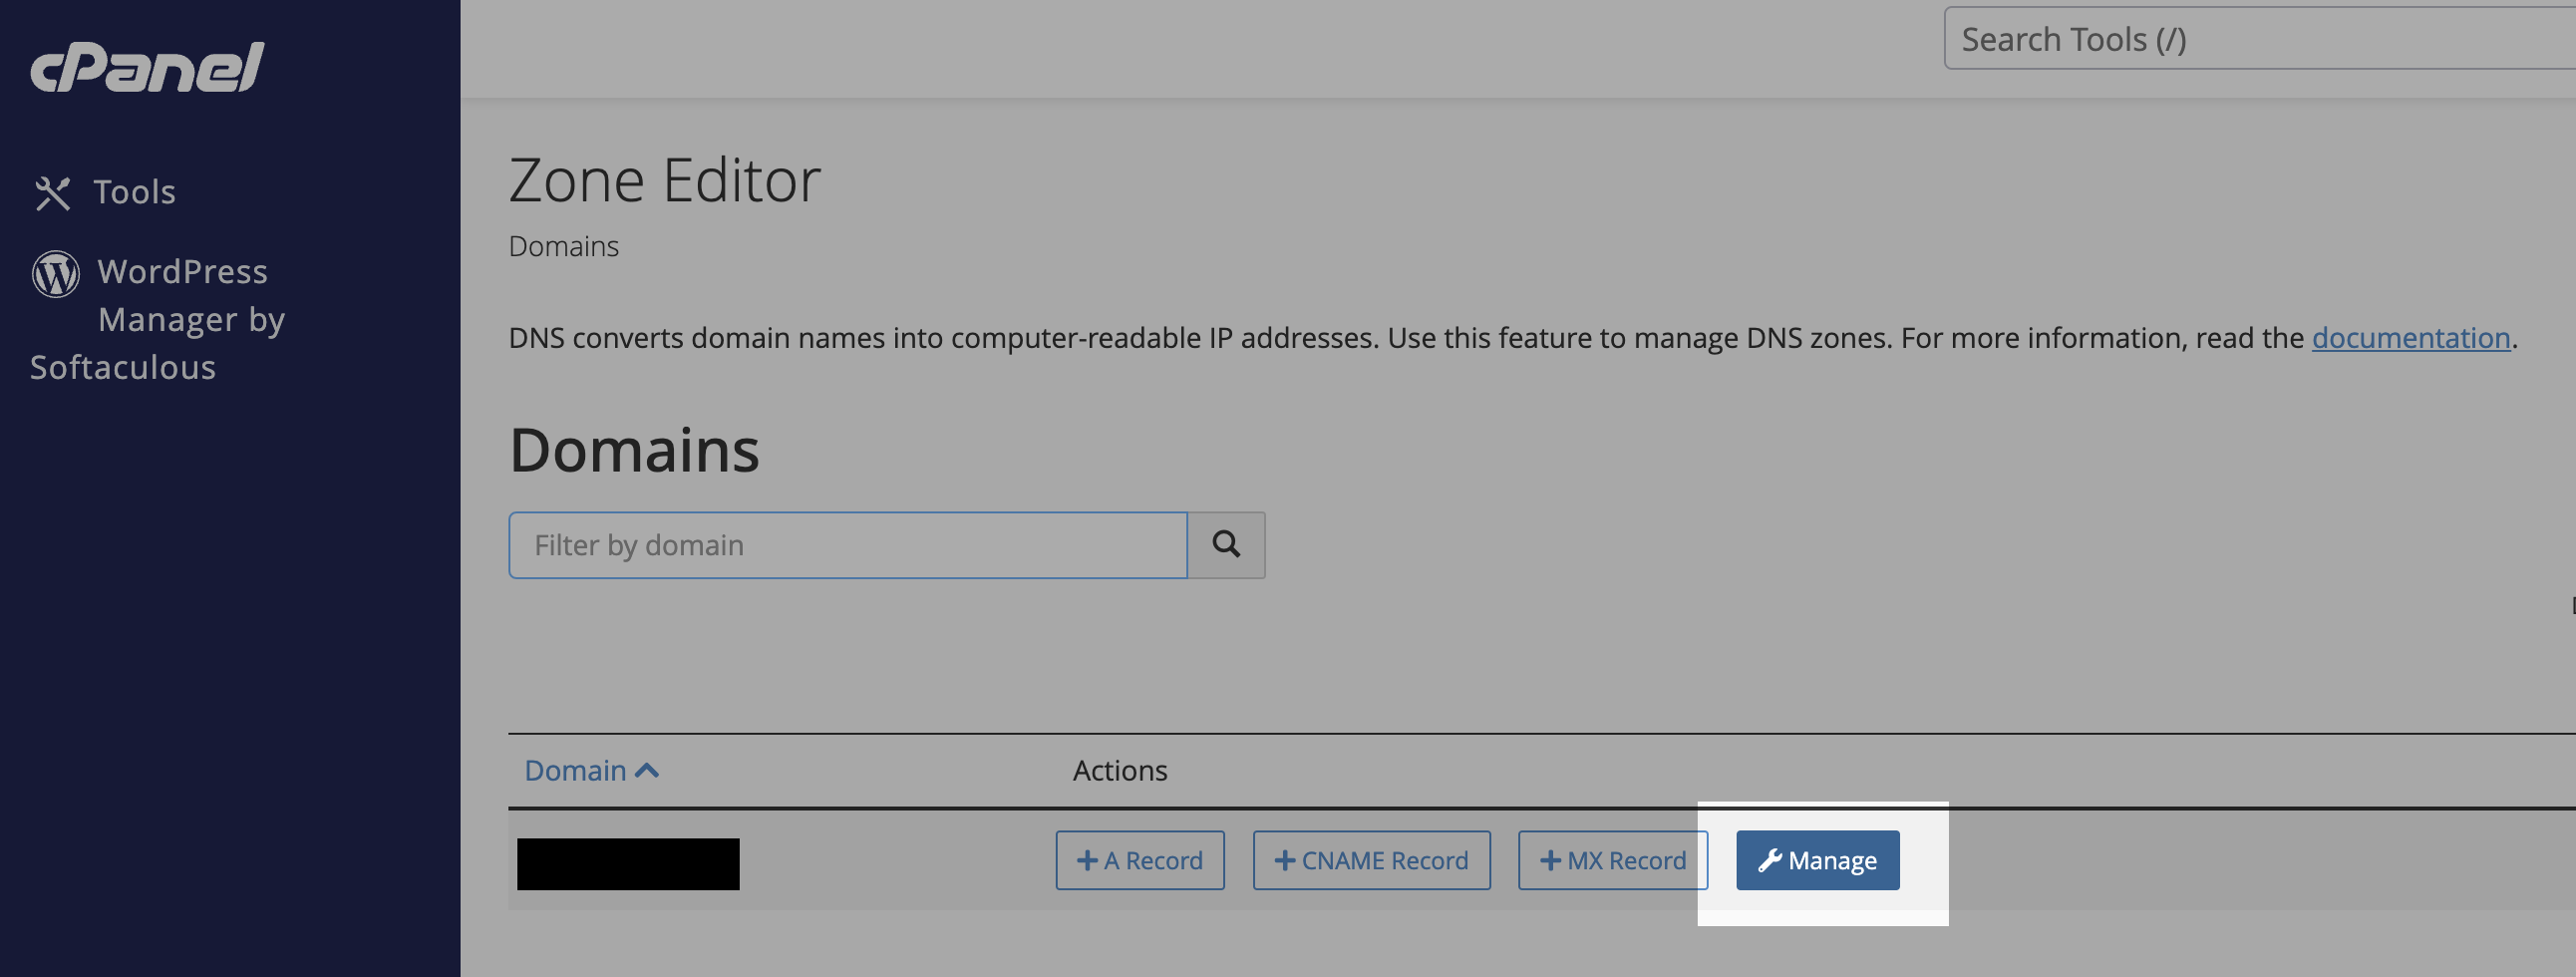
- Add a DNS Record
- Click on the “Add Record” button.
- Enter the domain for the record. For example
mydomain.comorsubdomain.mydomain.com. - Select the type of record you want to add (e.g., A, CNAME, MX, TXT).
- Enter the value for the record. For example, the IP address for an A record, the target for a CNAME record, or the mail server for an MX record.
- Click on the “Save Record” button to save the changes.
-
Website Optimisation Techniques
Optimising your website for better performance is essential to improve user experience, reduce bounce rates, and boost search engine rankings. In this article, we will discuss advanced optimisation techniques that can help you enhance your website’s performance.
- Configure .htaccess for Expires Headers
Expires headers instruct browsers to cache specific resources for a set period, reducing server load and improving load times. To enable Expires headers, add the following code to your .htaccess file:
<IfModule mod_expires.c> ExpiresActive On ExpiresByType image/jpg "access 1 year" ExpiresByType image/jpeg "access 1 year" ExpiresByType image/gif "access 1 year" ExpiresByType image/png "access 1 year" ExpiresByType text/css "access 1 month" ExpiresByType text/html "access 1 month" ExpiresByType application/pdf "access 1 month" ExpiresByType text/x-javascript "access 1 month" ExpiresByType application/x-shockwave-flash "access 1 month" ExpiresByType image/x-icon "access 1 year" ExpiresDefault "access 1 month" </IfModule>- Enable WordPress Caching
Caching can significantly improve your WordPress site’s performance by storing a static version of your pages. Install a caching plugin, such as WP Super Cache or W3 Total Cache, and configure it according to your site’s requirements.
Learn how to enable WordPress caching.
- Use LiteSpeed Cache (LSCache) and Optimise Database
LSCache is a powerful caching solution for LiteSpeed Web Server. Install the LiteSpeed Cache plugin for WordPress, and enable its database optimisation features to clean up and optimise your database tables.
- Implement a CDN
A Content Delivery Network (CDN) distributes your site’s static assets across multiple servers worldwide, ensuring faster delivery based on the user’s geographic location. Implementing a CDN can significantly reduce latency and improve loading speeds.
Learn how to configure Bunny.net CDN with WordPress.
- Disable wp-cron.php
By default, WordPress uses a file called wp-cron.php to schedule tasks. However, it can cause performance issues on high-traffic sites. Disable wp-cron.php by adding the following line to your wp-config.php file:
define(‘DISABLE_WP_CRON’, true); Then, set up a manual cron job via your hosting control panel (cPanel) to run the script at specific intervals.
- Enable SSL
Secure Sockets Layer (SSL) encrypts data between your website and users, improving security and boosting search engine rankings. Obtain an SSL certificate for your domain and configure your website to use HTTPS.
Learn how to enable SSL on your website.
- Optimise PHP in cPanel
Ensure that your server is running the latest stable version of PHP, as newer versions generally offer better performance. In cPanel, navigate to “MultiPHP Manager” and select the desired PHP version for your website. Additionally, configure PHP settings (memory limit, execution time, etc.) according to your site’s needs.
- Minimise External Resources
External resources, such as fonts, scripts, and stylesheets, can increase the number of HTTP requests and slow down your site. Limit the use of external resources and consider hosting them locally to reduce load times.
- Optimise WordPress Plugins and Themes
Choose lightweight, well-coded plugins and themes for your WordPress site. Regularly update and remove any unused or outdated plugins to prevent performance issues and security vulnerabilities.
-
How to use PHP in the terminal
When using PHP in the terminal, you have to specify the full path to the PHP binary. This guide will show you how to use PHP in the terminal.
PHP Paths
The following paths are used to run PHP in the terminal:
- PHP 5.6
/opt/cpanel/ea-php56/root/usr/bin/php - PHP 7.0
/opt/cpanel/ea-php70/root/usr/bin/php - PHP 7.1
/opt/cpanel/ea-php71/root/usr/bin/php - PHP 7.2
/opt/cpanel/ea-php72/root/usr/bin/php - PHP 7.3
/opt/cpanel/ea-php73/root/usr/bin/php - PHP 7.4
/opt/cpanel/ea-php74/root/usr/bin/php - PHP 8.0
/opt/cpanel/ea-php80/root/usr/bin/php - PHP 8.1
/opt/cpanel/ea-php81/root/usr/bin/php - PHP 8.2
/opt/cpanel/ea-php82/root/usr/bin/php - PHP 8.3
/opt/cpanel/ea-php83/root/usr/bin/php
How to use PHP in the terminal
To use PHP in the terminal, you have to specify the full path to the PHP binary. For example, to run
composer installusing PHP 8.0, you can run the following command:/opt/cpanel/ea-php80/root/usr/bin/php /usr/local/bin/composer installAdding PHP to the PATH
To add PHP to the PATH, you can create a symbolic link to the PHP binary. For example, to add PHP 8.3 to the PATH, you can run the following command:
ln -s /opt/cpanel/ea-php82/root/usr/bin/php /usr/local/bin/phpAfter running this command, you can use PHP in the terminal without specifying the full path to the PHP binary.
Alternatively, you can add the following line to your
~/.bashrcfile:export PATH=/opt/cpanel/ea-php82/root/usr/bin:$PATHYou can add this to your
~/.bashrcfile by running the following commands:cd ~ echo 'export PATH=/opt/cpanel/ea-php82/root/usr/bin:$PATH' >> ~/.bashrc source ~/.bashrcRemember to adjust the
ea-php82part of the path to match the version of PHP you want to use.After adding this line, you can use PHP in the terminal without specifying the full path to the PHP binary.
For example, you can run the following command to check the PHP version:
php -v - PHP 5.6